LEDs are becoming all the rage now, and more and more people are wanting to convert their interior lighting and guage backlighting to LEDs. Here is some info on how to do this upgrade on any NBS fullsize truck from 2003-2007 or SUV from 2003-2006. Patience, a steady hand and soldering skills are a must if you want to tackle this upgrade. You will neeed about 20 5mm LEDs and enough resistors to go with them. The resistor value depends on whaich type and/or color LED you end up using.
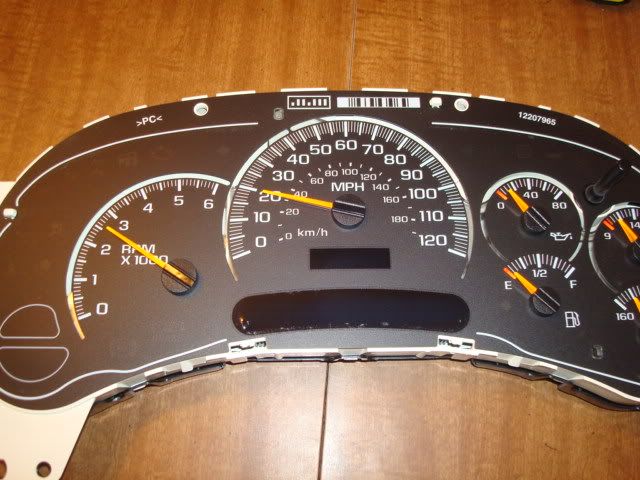
First, remove the cluster from the vehicle, and lay it out on your table or workbench. You will need a small flathead screwdriver or similar prying tool and pry the cluster open. You will want to take off the clear gauge lense first. Do this by prying up the tabs, and slowly working your way around the cluster.

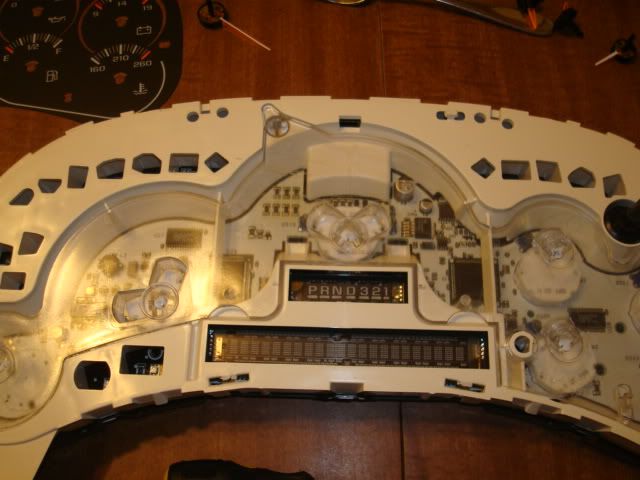
With the front lense/bezel removed, the cluster now looks this.
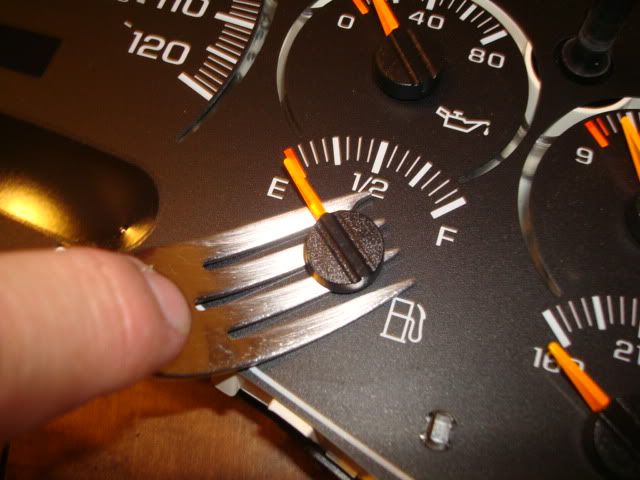
Next you will need to remove the guage needles. Be VERY careful with this step. You will need to mark where each needle is pointing, and re-install each needle in the same exact position when you re-assemble the cluster. To remove the needles, the best tool is a simple dinner fork. Yes, I said dinner fork. Slide the firk under each needle and pull straight up, being VERY CAREFUL to pop the needle off without turning it. Remember, you need to have it pointing in the same spot when done.
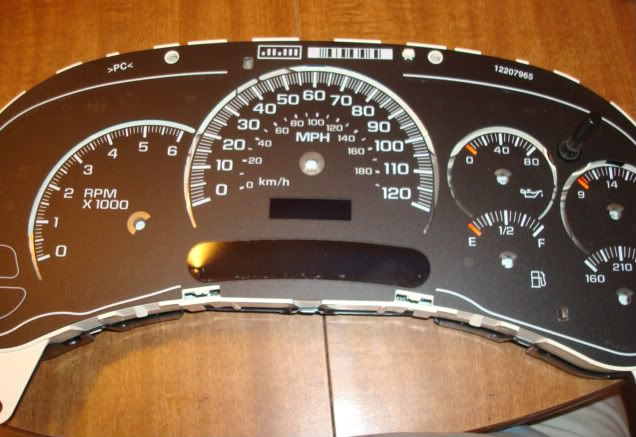
Now with all the needles removed, you can then remove the guage overlay. It is just popped onto some tabs or "nubs" around the cluster face. Just carefully pop the overlay up off of each nub.
Now you have to lift out the clear light diffuser that is laying inside the cluster. Just carefull lift it straight up, it isnt secured to anything.
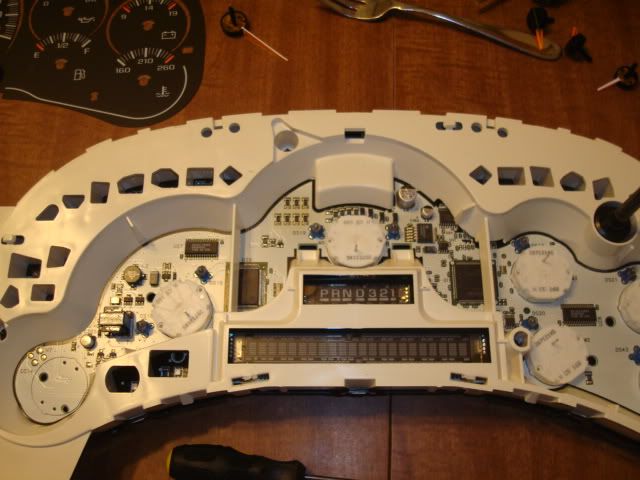
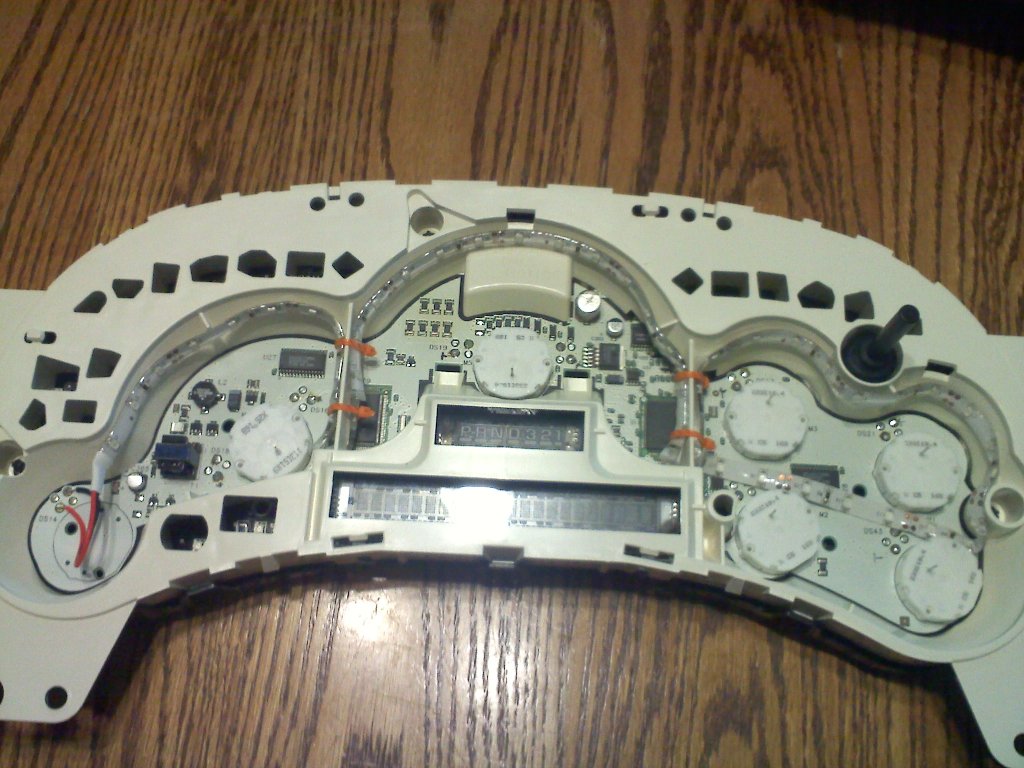
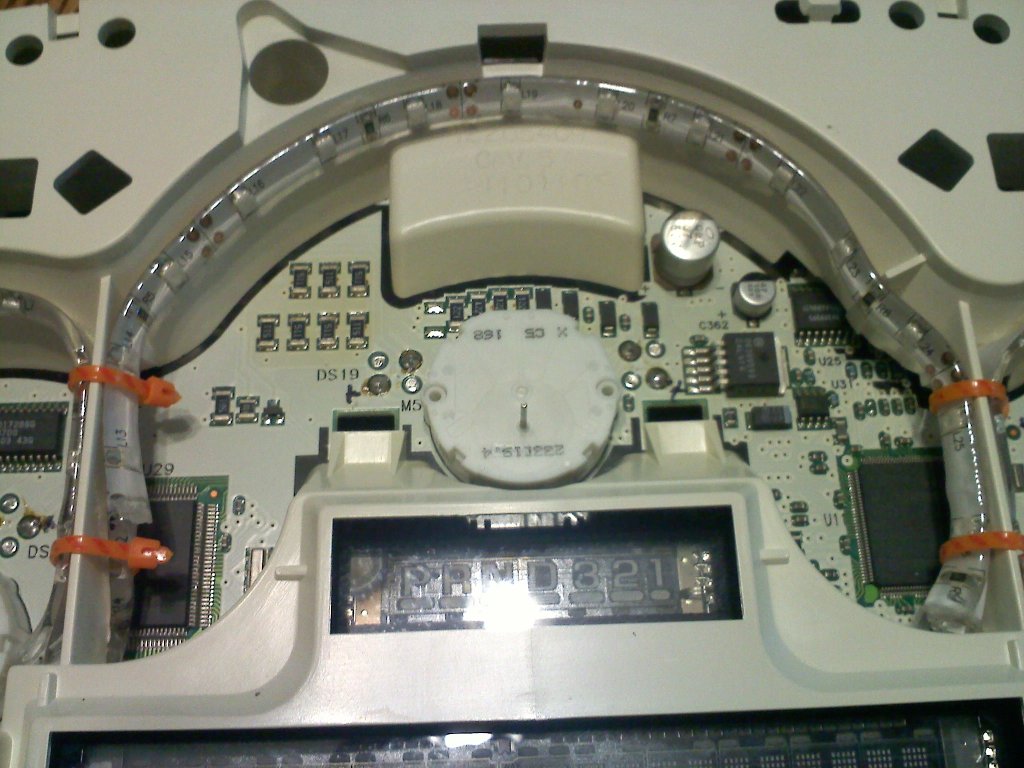
Now with the light diffuser removed.
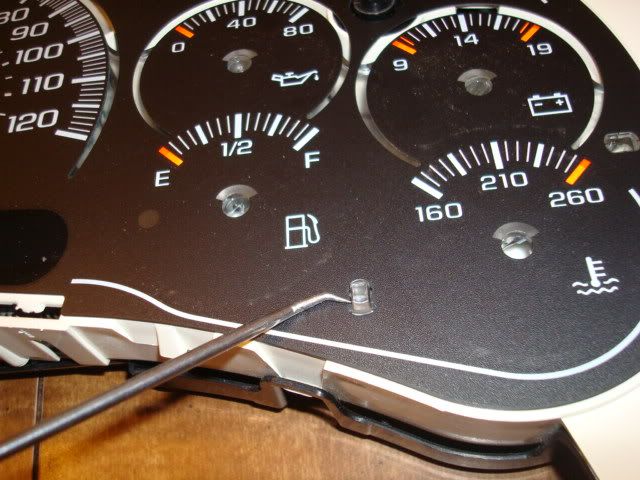
Now you need to remove the white surround to get to the actual circuit board. You will need to pry it off just like the lense/bezel was.

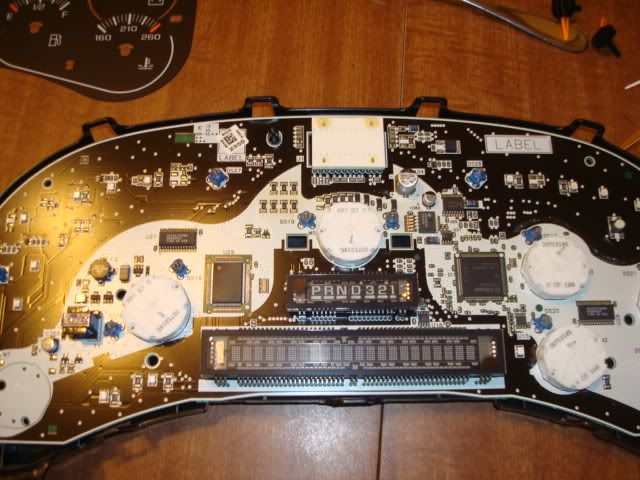
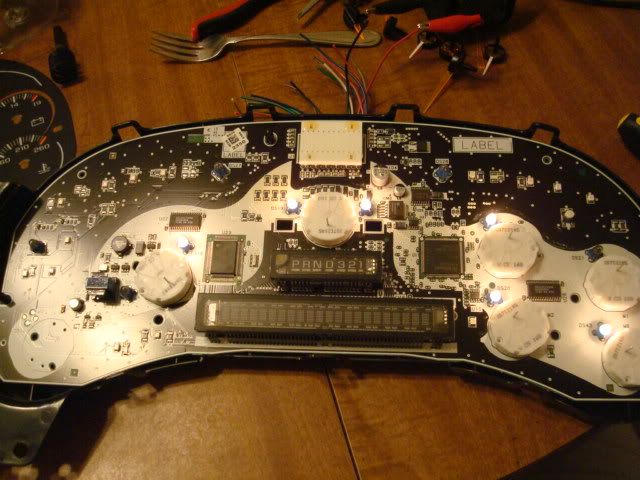
Now this is what you have with everything removed except the back of the cluster.
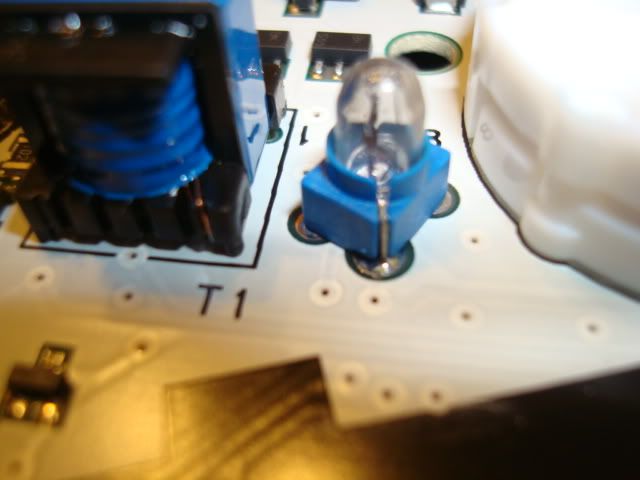
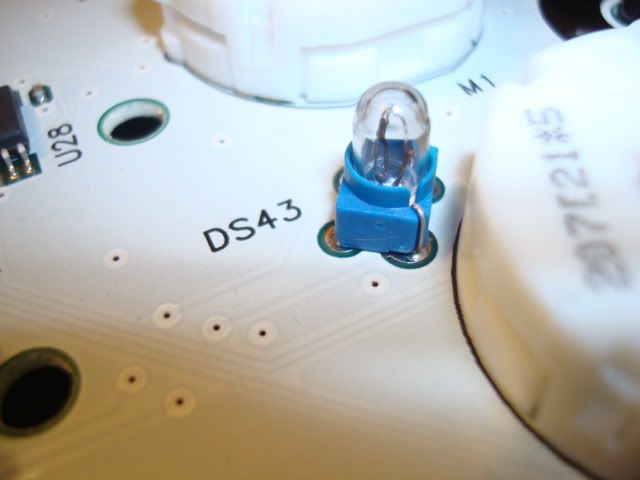
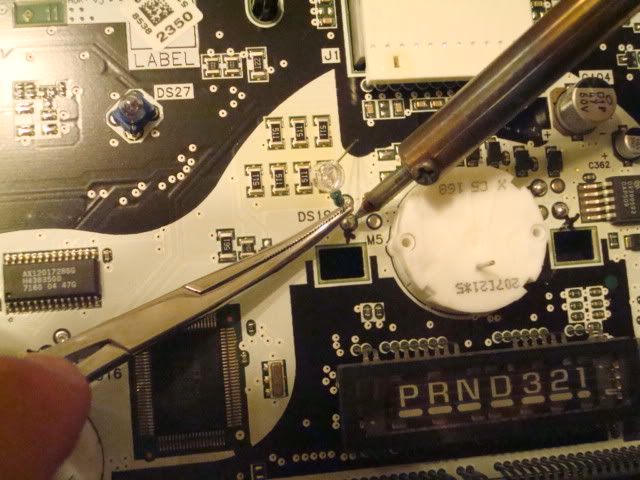
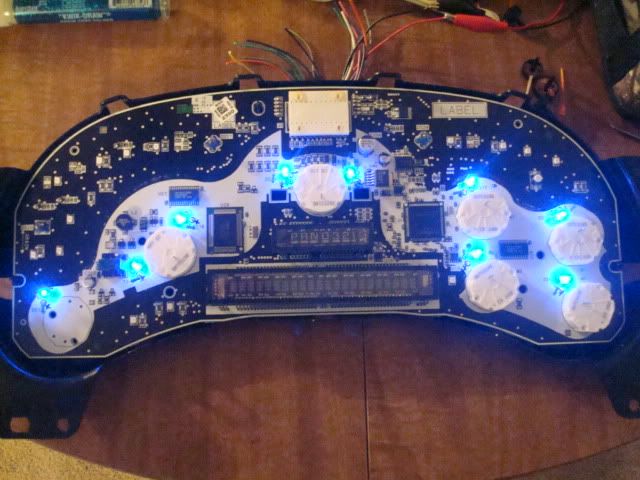
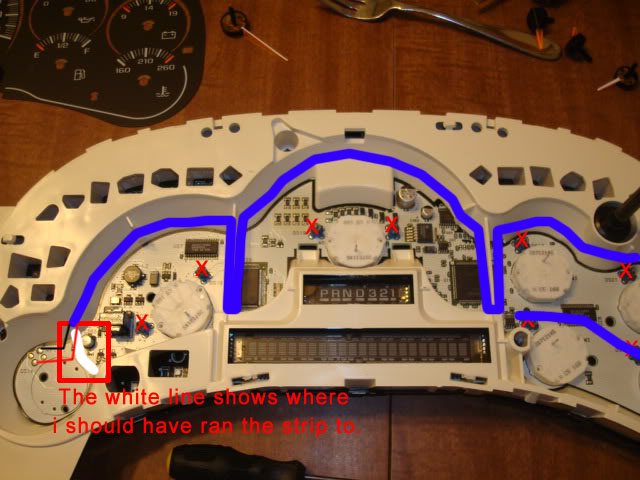
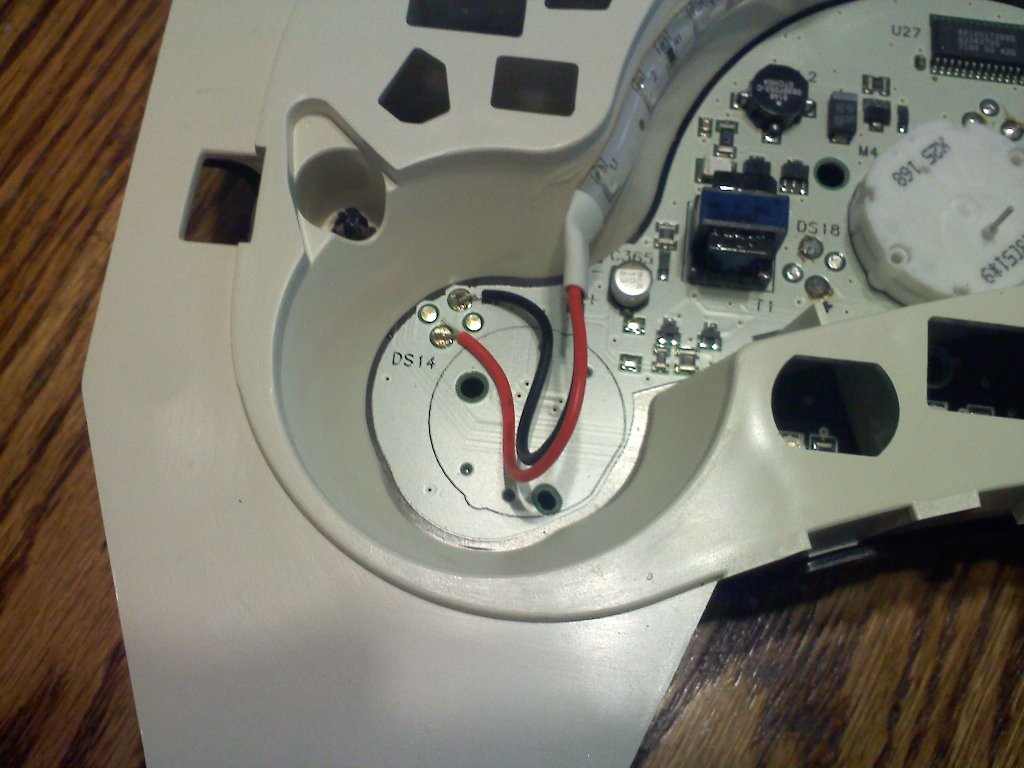
Now you need to remove all the stock bulbs from the board by unsoldering them. Only remove the ones on the white area of the board, which is the area behind the guages. This is what the stock bulbs look like.
At this point, you need to go plug the cluster back into your truck and use a meter to find out which solder terminals for each bulb are positive and negative. You do NOT want to use a conventional grounding test light, use a digital multimeter. You could also do this before you remove the bulbs if you choose to. Use a sharpie and mark each one postive and negative.

Another option is to go cut a harness pigtail from a truck in the junkyard and you can then power the cluster on your workbench with a 12v power supply. That is what I did.
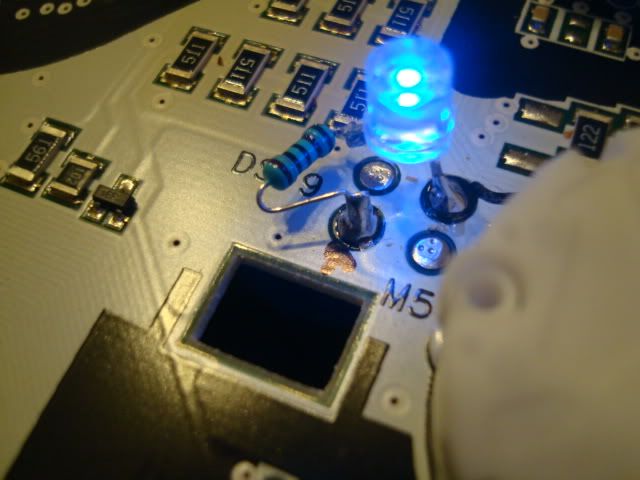
Now at this point, you should have all your polarity marked and the stock bulbs removed. Now you can solder your resistors to the LEDs. The resistor needs to go on the positive leg of the LED. Now carefully solder the resistor to the terminal that you marked positive, and the other leg of the LED to negative terminal.
Now do the same thing across the board with 9 more LEDs. Now power up the cluster to verify all the LEDs are working, before you re-assmble everything.
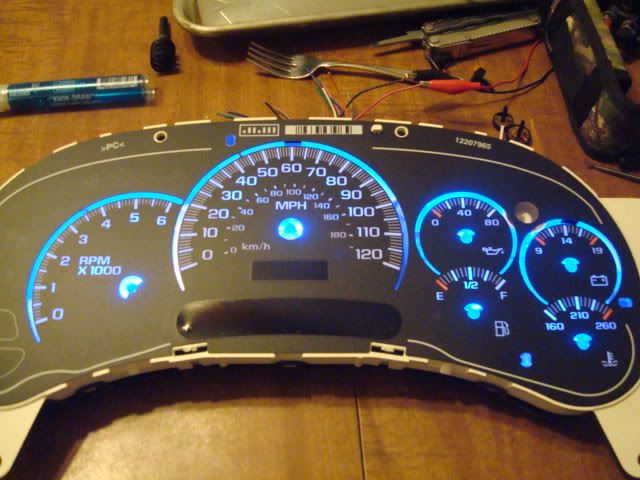
At this point you can lay the clear diffuser and the overlay back on and see if any of the LEDs need to be moved or "adusted" for better light output or spread.
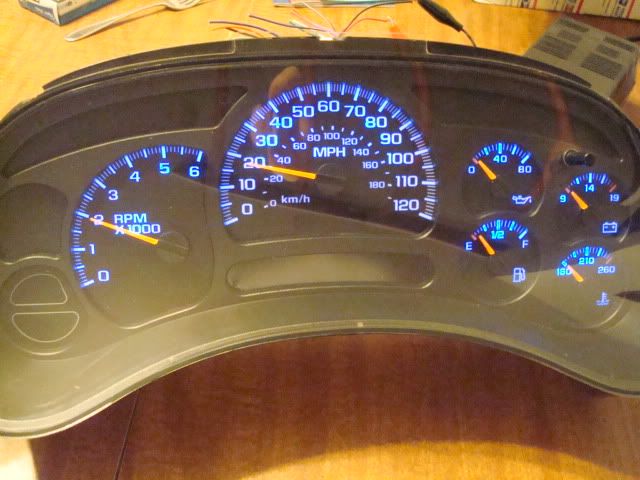
Now once you are satisfied with the light output of the LEDs, you can re-assemble the cluster. Re-assembly is the reverse of the dis-assembly process. Just be VERY careful when putting the needles back on to get them in the same exact spots they were in before you removed them.
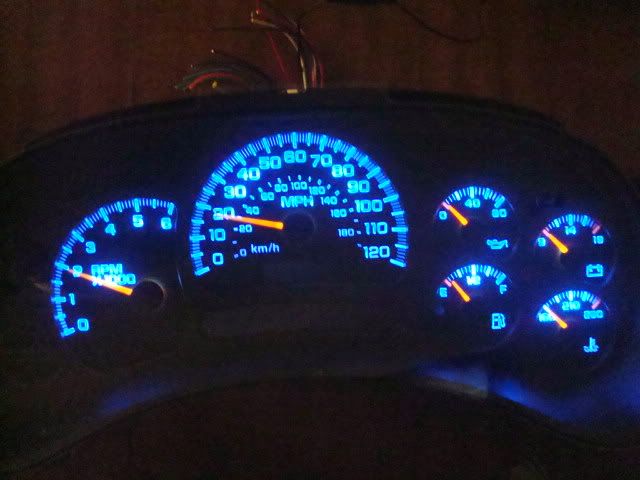
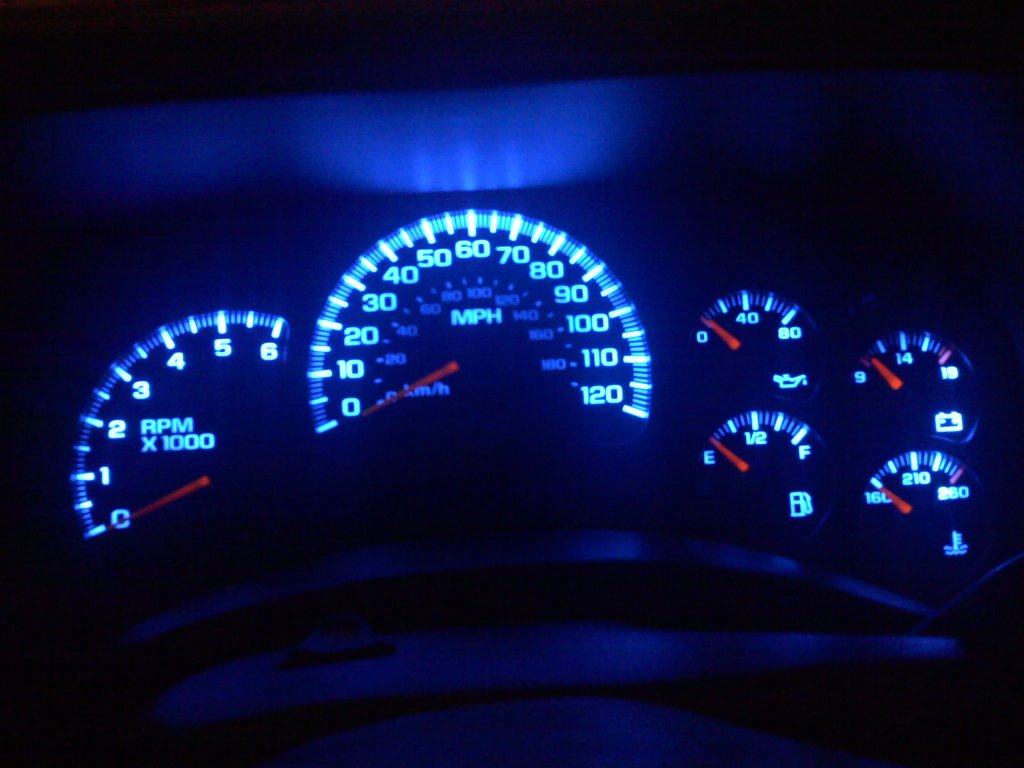
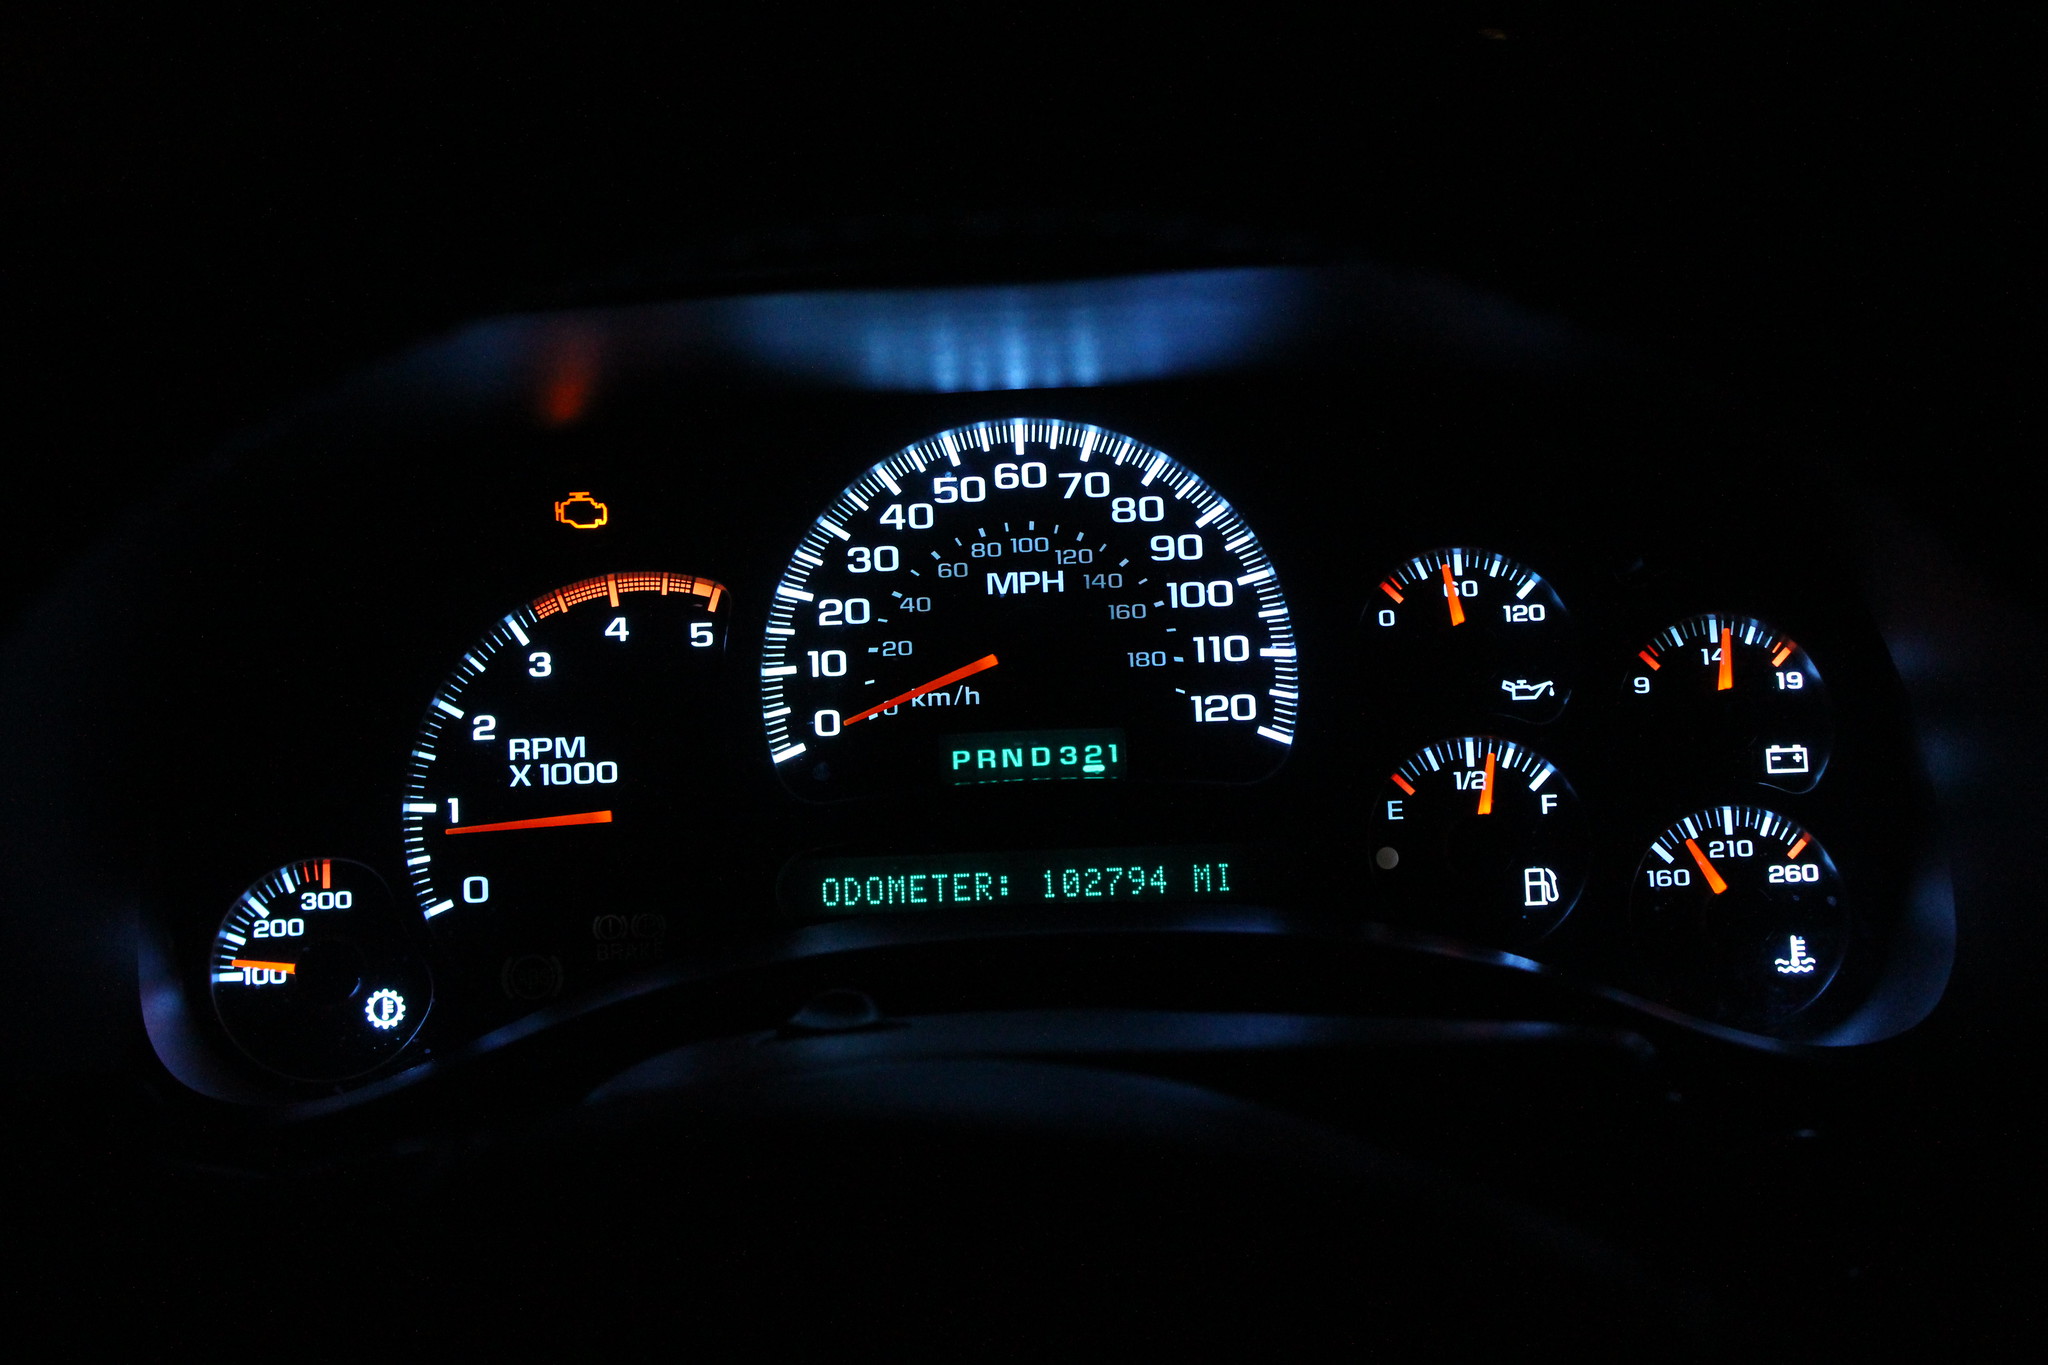
Now once you get the cluster all back together, go plug it in your truck and be amazed at how frikkin awesome your cluster now looks. Now go have a cold beer.

First, remove the cluster from the vehicle, and lay it out on your table or workbench. You will need a small flathead screwdriver or similar prying tool and pry the cluster open. You will want to take off the clear gauge lense first. Do this by prying up the tabs, and slowly working your way around the cluster.
With the front lense/bezel removed, the cluster now looks this.
Next you will need to remove the guage needles. Be VERY careful with this step. You will need to mark where each needle is pointing, and re-install each needle in the same exact position when you re-assemble the cluster. To remove the needles, the best tool is a simple dinner fork. Yes, I said dinner fork. Slide the firk under each needle and pull straight up, being VERY CAREFUL to pop the needle off without turning it. Remember, you need to have it pointing in the same spot when done.
Now with all the needles removed, you can then remove the guage overlay. It is just popped onto some tabs or "nubs" around the cluster face. Just carefully pop the overlay up off of each nub.
Now you have to lift out the clear light diffuser that is laying inside the cluster. Just carefull lift it straight up, it isnt secured to anything.
Now with the light diffuser removed.
Now you need to remove the white surround to get to the actual circuit board. You will need to pry it off just like the lense/bezel was.
Now this is what you have with everything removed except the back of the cluster.
Now you need to remove all the stock bulbs from the board by unsoldering them. Only remove the ones on the white area of the board, which is the area behind the guages. This is what the stock bulbs look like.
At this point, you need to go plug the cluster back into your truck and use a meter to find out which solder terminals for each bulb are positive and negative. You do NOT want to use a conventional grounding test light, use a digital multimeter. You could also do this before you remove the bulbs if you choose to. Use a sharpie and mark each one postive and negative.
Another option is to go cut a harness pigtail from a truck in the junkyard and you can then power the cluster on your workbench with a 12v power supply. That is what I did.
Now at this point, you should have all your polarity marked and the stock bulbs removed. Now you can solder your resistors to the LEDs. The resistor needs to go on the positive leg of the LED. Now carefully solder the resistor to the terminal that you marked positive, and the other leg of the LED to negative terminal.
Now do the same thing across the board with 9 more LEDs. Now power up the cluster to verify all the LEDs are working, before you re-assmble everything.
At this point you can lay the clear diffuser and the overlay back on and see if any of the LEDs need to be moved or "adusted" for better light output or spread.
Now once you are satisfied with the light output of the LEDs, you can re-assemble the cluster. Re-assembly is the reverse of the dis-assembly process. Just be VERY careful when putting the needles back on to get them in the same exact spots they were in before you removed them.
Now once you get the cluster all back together, go plug it in your truck and be amazed at how frikkin awesome your cluster now looks. Now go have a cold beer.
Last edited by a moderator:

 just trying to share some knowledge