
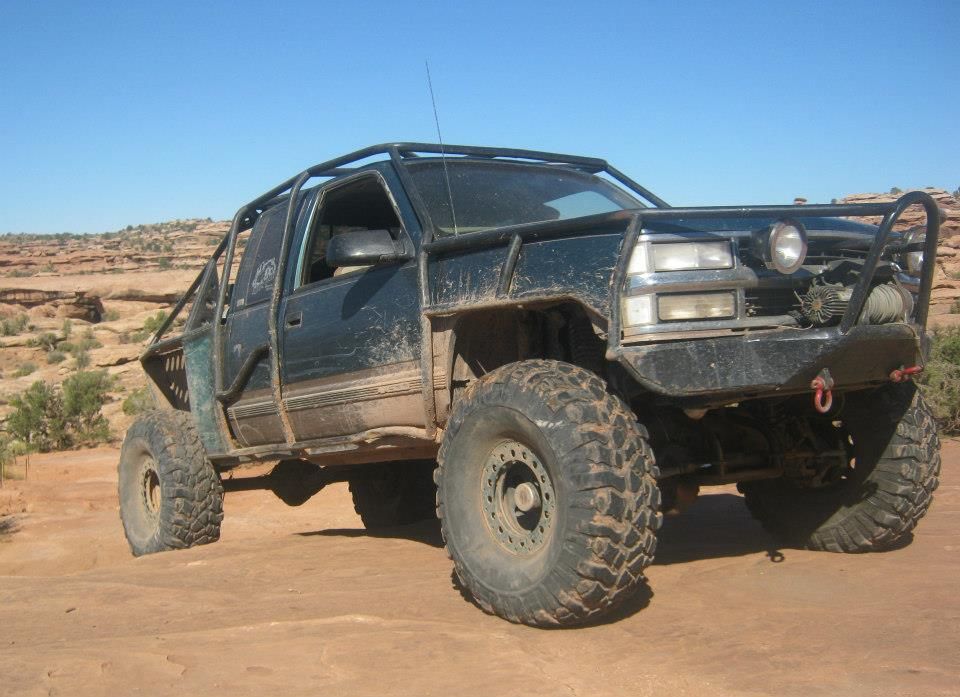
Project Paper Weight
- Thread starter bggrnchvy
- Start date
You are using an out of date browser. It may not display this or other websites correctly.
You should upgrade or use an alternative browser.
You should upgrade or use an alternative browser.
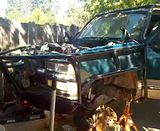
Well it runs.
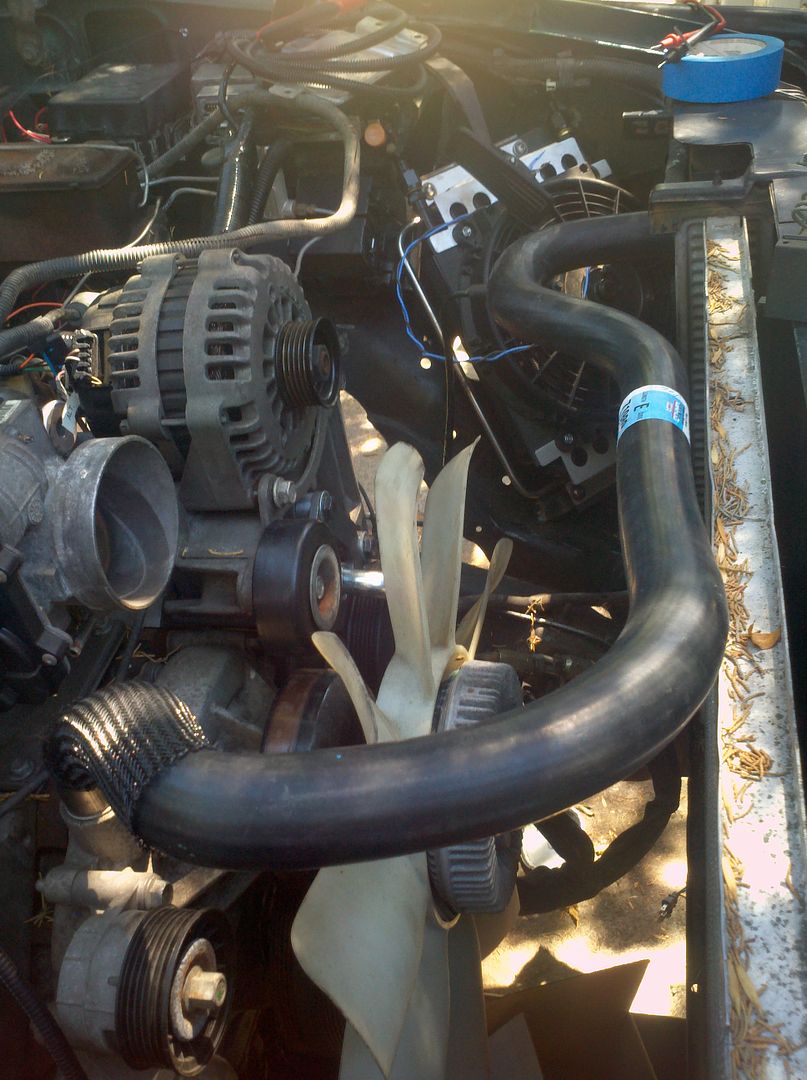
LQ4 HD truck lower rad hose fits great.
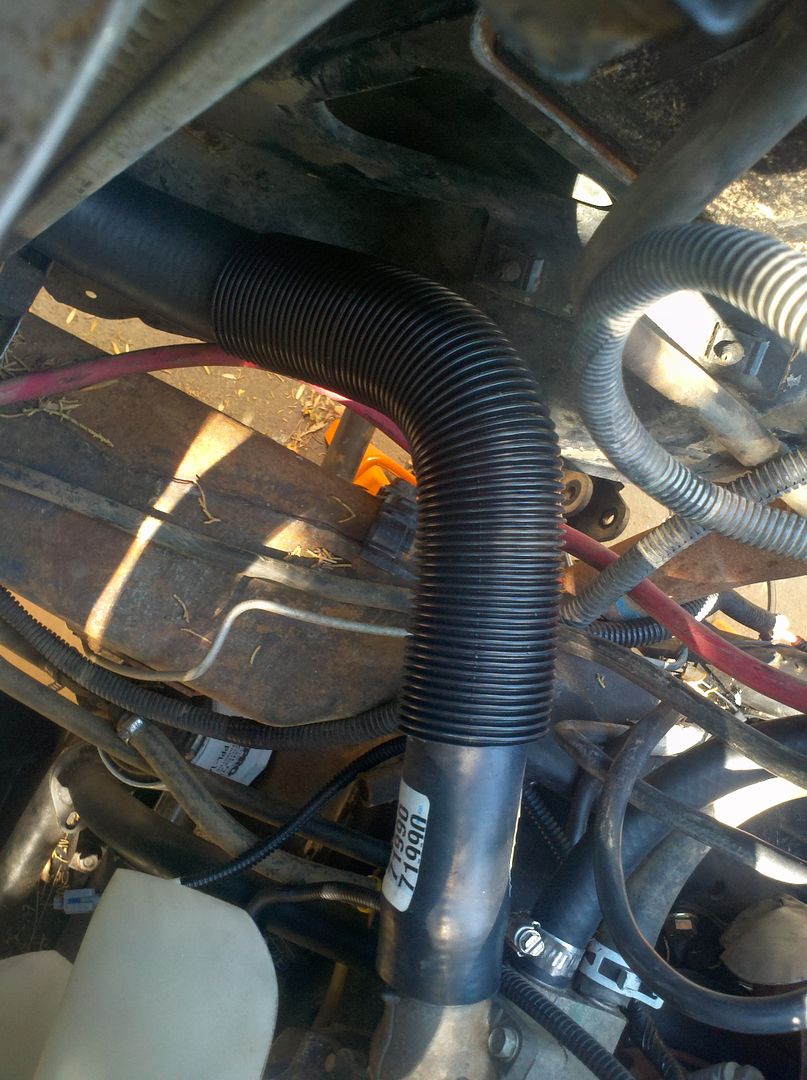
Same spec truck upper fits...other than the shroud. It may clear the hood, not sure yet.
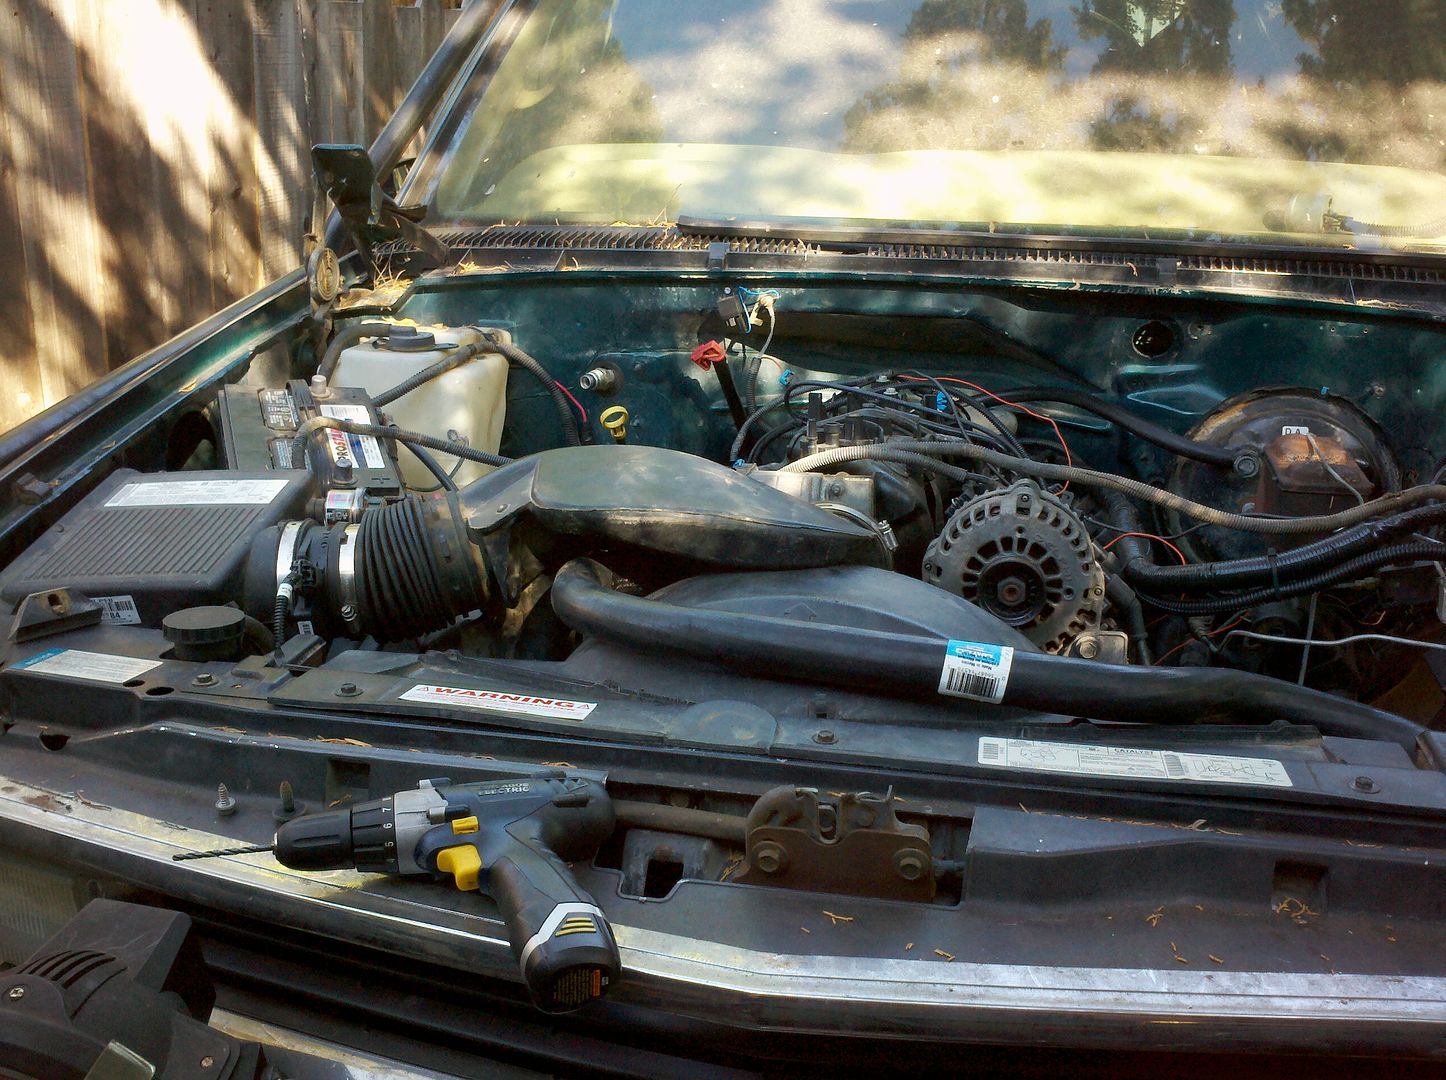
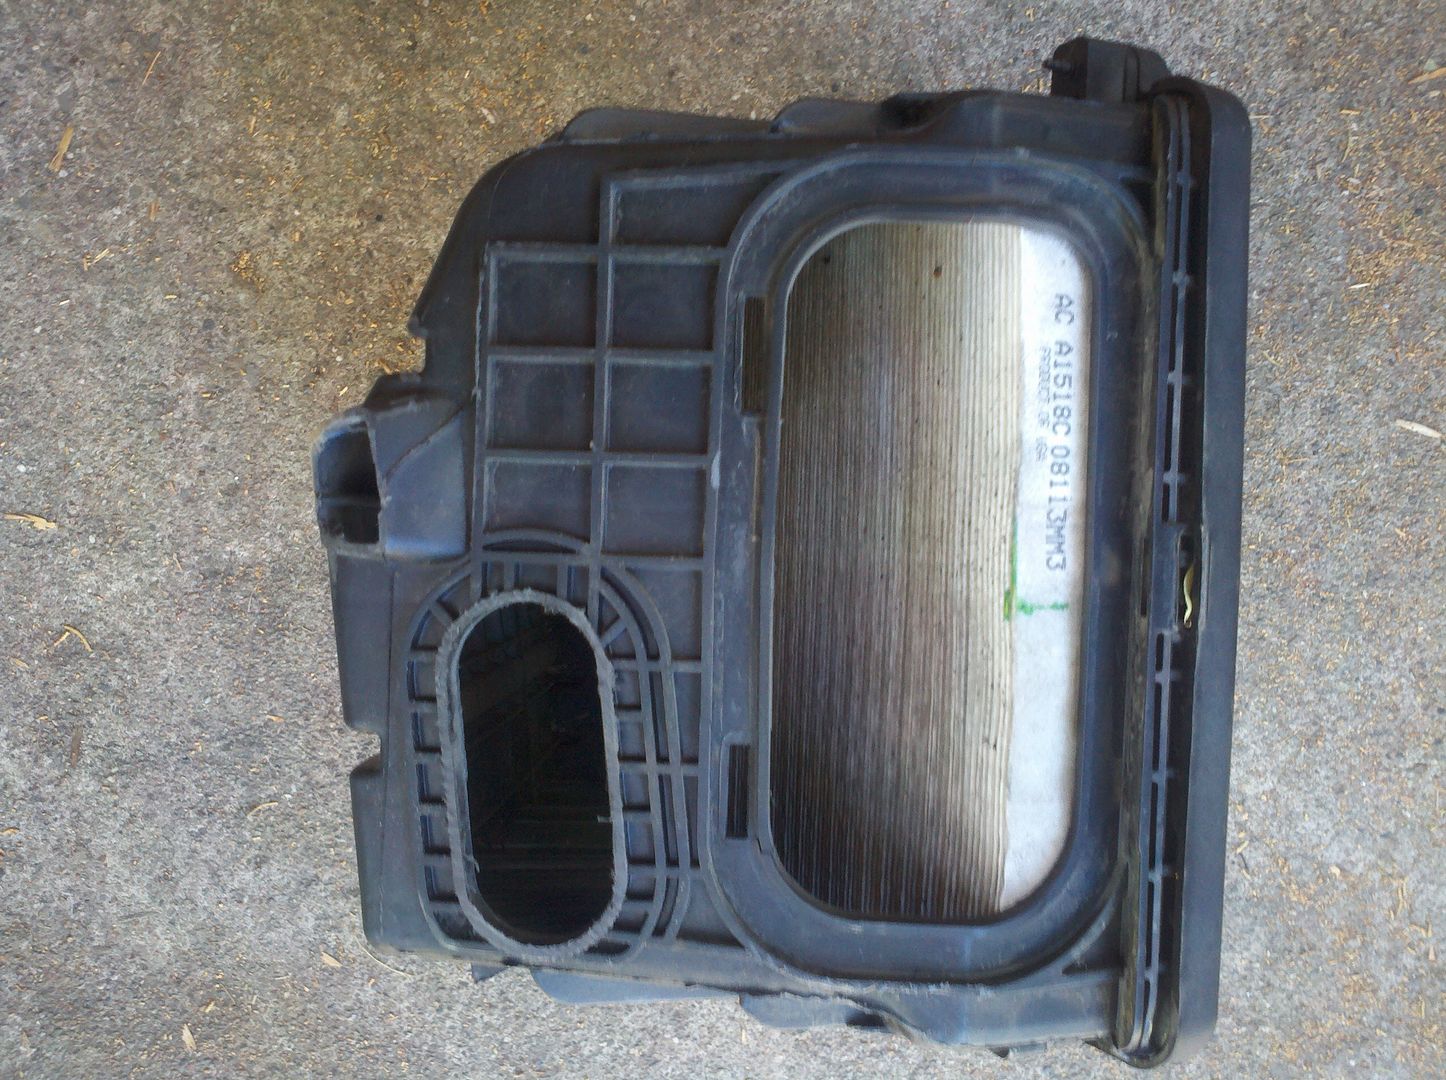
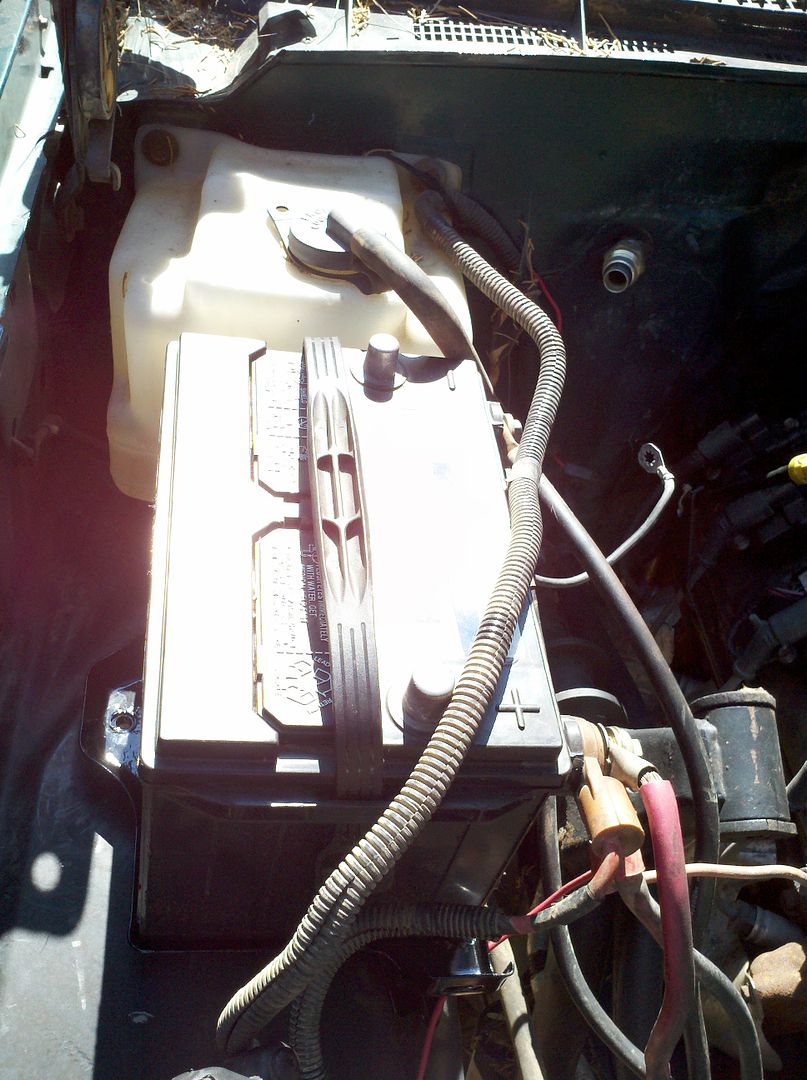
Factory 06 truck intake will work great. I'll mod the factory battery tray to move it back and still have to mount the box itself.
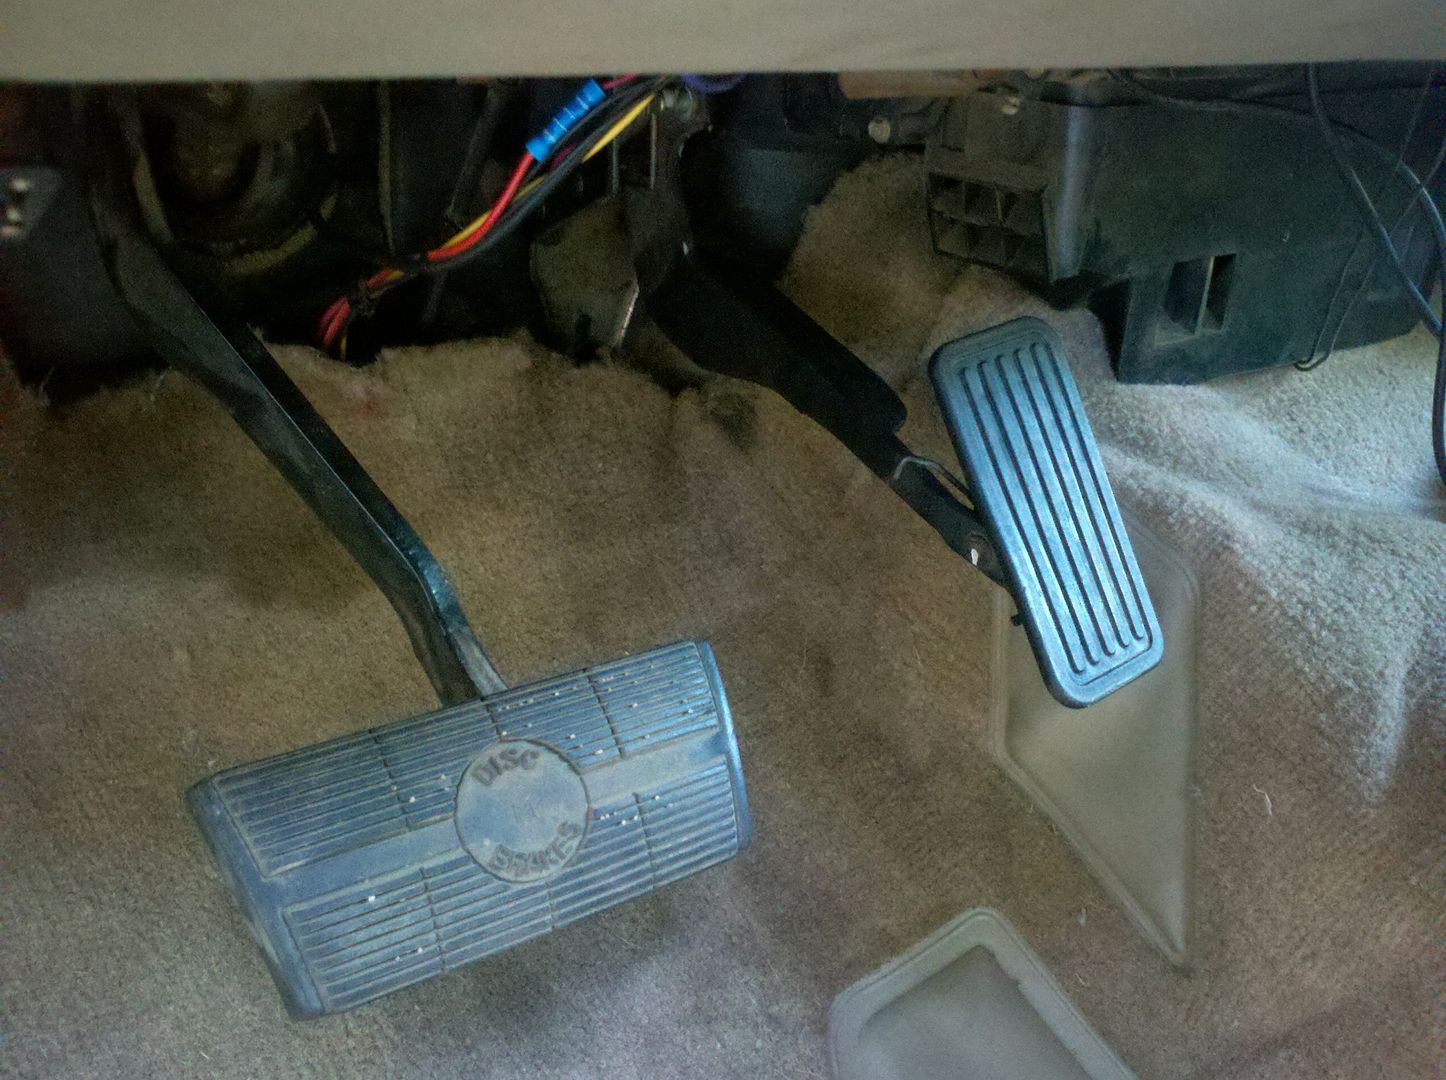
Factory pedal wouldn't work in any shape or form.
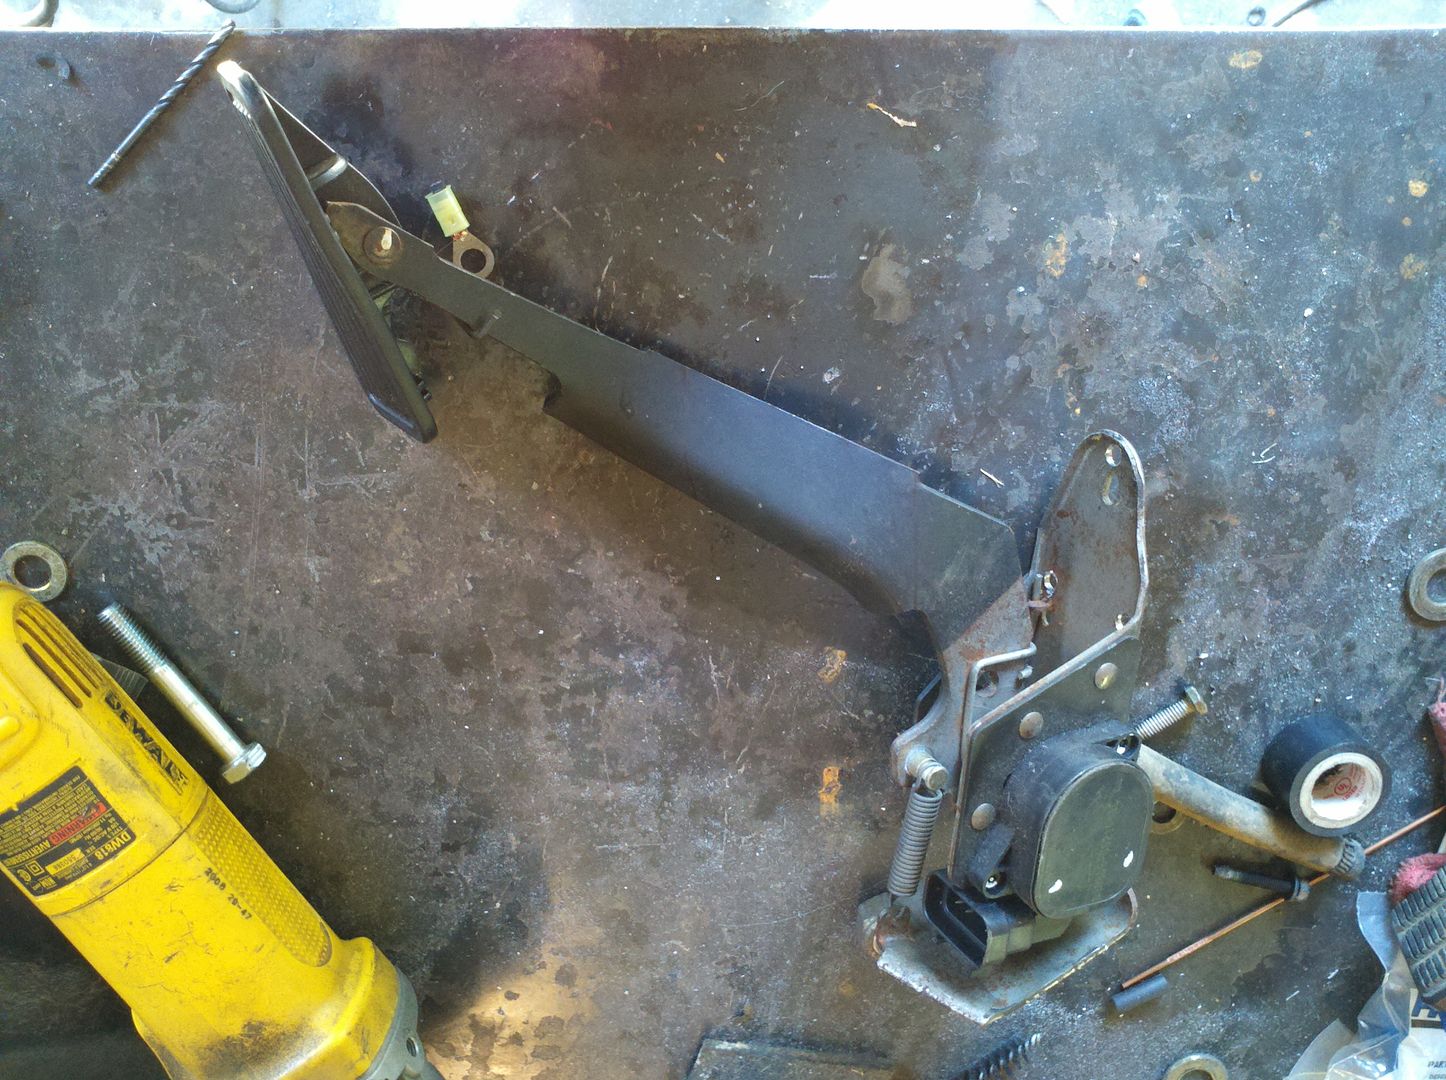
I drilled a new mounting pattern into the bottom of the bracket to fit the factory tripod mount. I also cut, sectioned, straightened and welded a gusset on the mount to bring it about where I needed it.
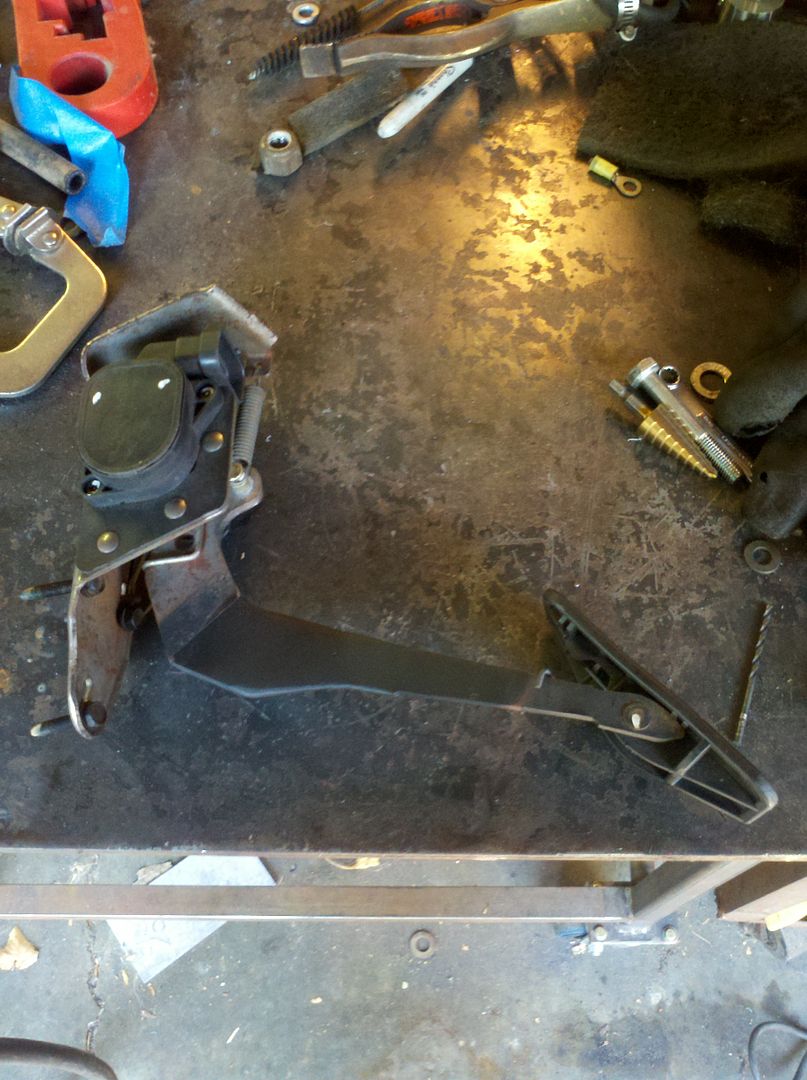
It's a touch high, doing it again I'd drop it an inch towards the floor. Still has good feel and I'll be leaving it.
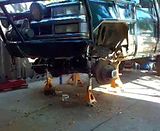
More to come, hoping to get it off the jack stands in the next week or two.
LQ4 HD truck lower rad hose fits great.
Same spec truck upper fits...other than the shroud. It may clear the hood, not sure yet.
Factory 06 truck intake will work great. I'll mod the factory battery tray to move it back and still have to mount the box itself.
Factory pedal wouldn't work in any shape or form.
I drilled a new mounting pattern into the bottom of the bracket to fit the factory tripod mount. I also cut, sectioned, straightened and welded a gusset on the mount to bring it about where I needed it.
It's a touch high, doing it again I'd drop it an inch towards the floor. Still has good feel and I'll be leaving it.
More to come, hoping to get it off the jack stands in the next week or two.
Last edited:
So where were we?
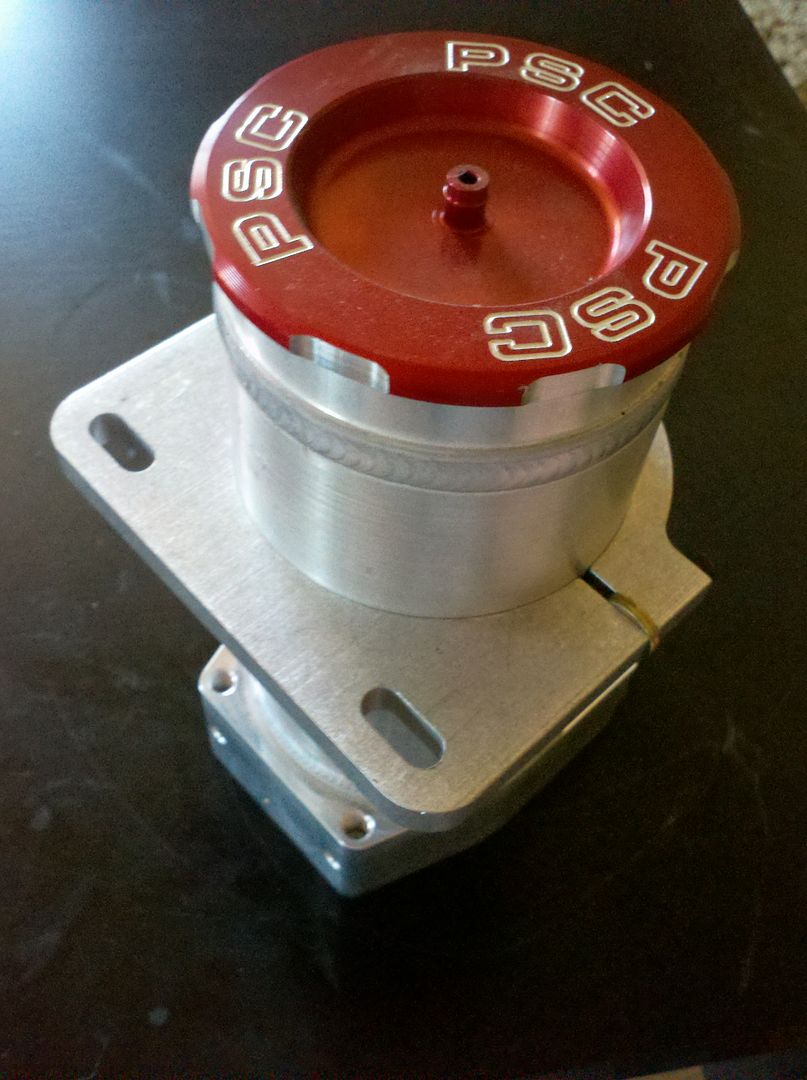
Oh, power steering. For this incarnation as you might remember I'm using a 235 p-pump from a C60-6500 Kodiak with a tall deck 366 or 472. I modified it to run canless. To seal the housing, I had to use a bit of Marine-Tex to keep the seeping from occurring and as it is now will have to redrill a feed hole at some point next week to keep the front seal from weeping.
In any case, I mounted the reservoir after putting washers in the supplied mount. The design assumes the can is rigid enough to tension the bolts at torque when in fact the rigidity is directly related to whether the cap is on or not. With the washers in the bolts are in equal tension all the time and the lower threaded holes in the back of the reservoir base are in shear keeping it in place.
Some have had the clam shell mount fail, I wanted to avoid that.
Here's the mount for the reservoir I burned together. A little tube leftover tubing and some modified angle laying around meant free fifty.
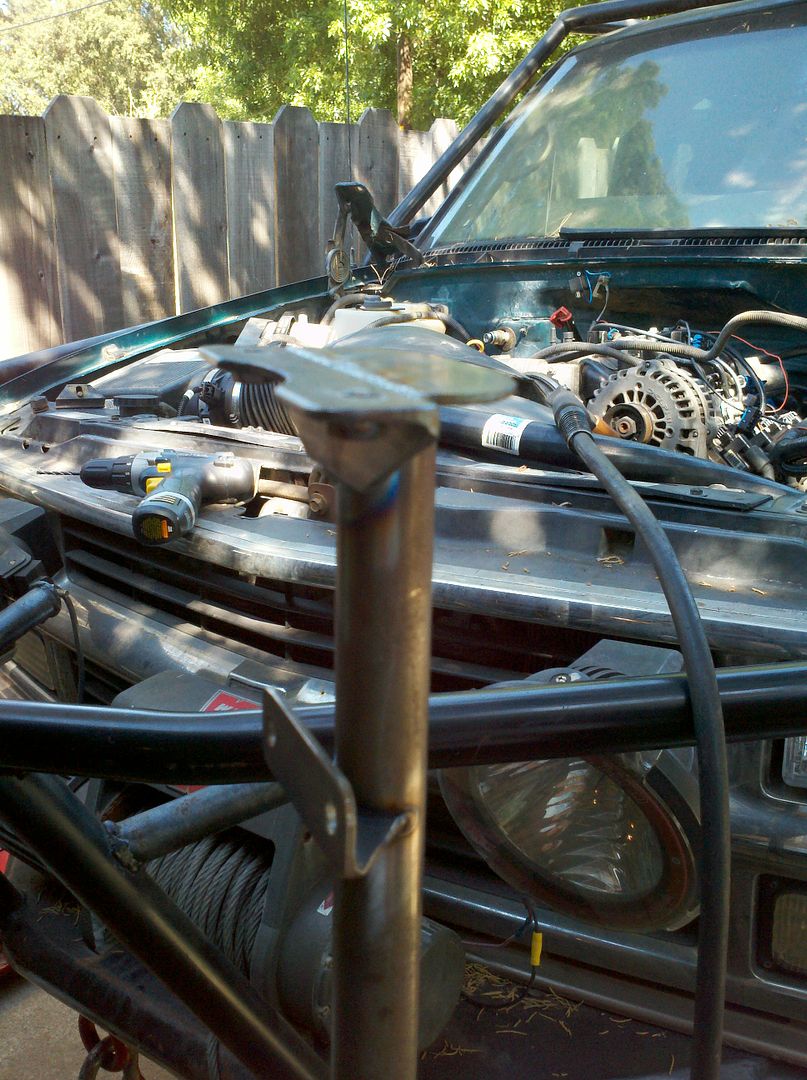
Used the tig, but I stopped and started a couple times trying to work my way around which wasn't the cleanest.

Burned in place.
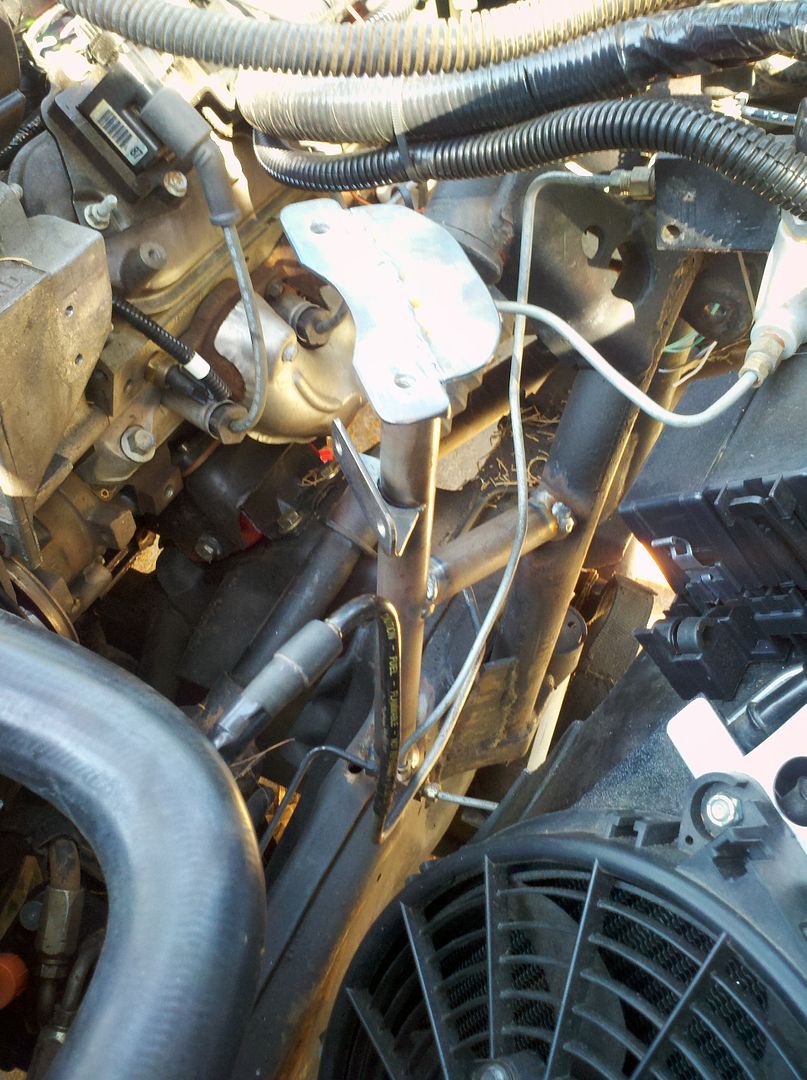
Reservoir in place and hole cut for intake. I had to move the battery back to fit the newer intake so I needed a new inlet for fresh air.
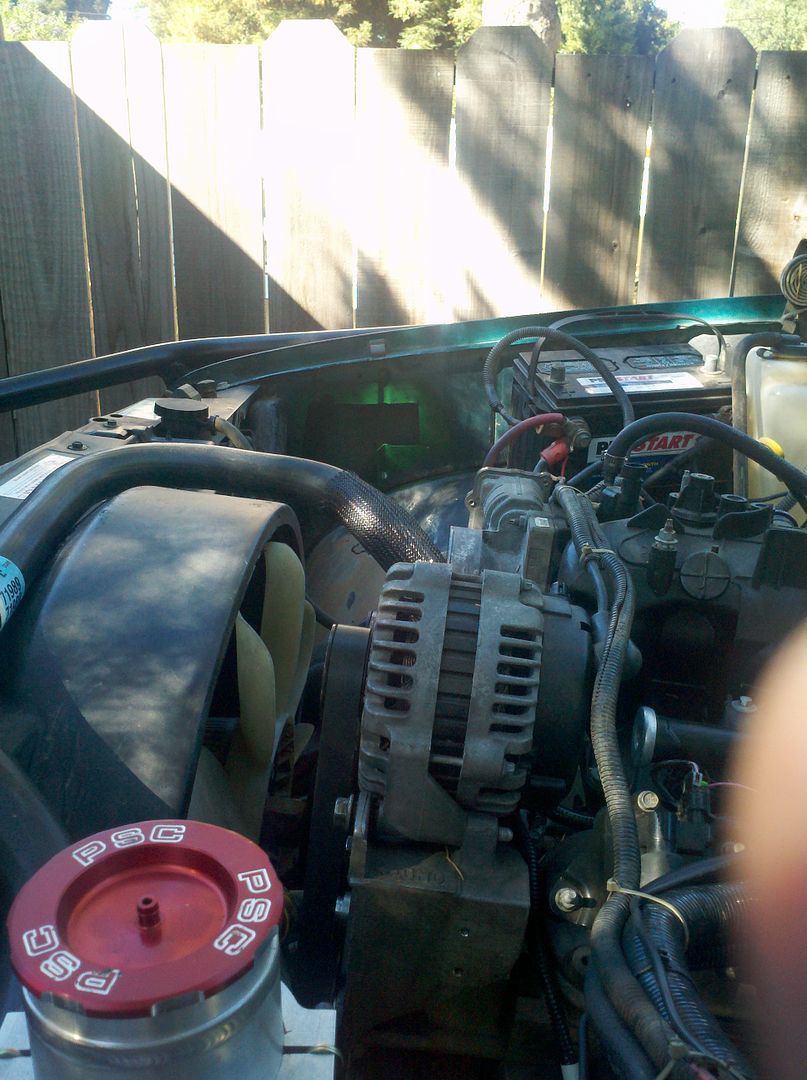
I removed the inlet tubes to make more room for the width of the intake.
The battery tray got cleaned of the factory mounts and I chopped them up to mount it on the inner fender further back.
After a lot of screwing around sealing the pump it finally works well but is now dripping again. Time for oil passage modification.
Oh, power steering. For this incarnation as you might remember I'm using a 235 p-pump from a C60-6500 Kodiak with a tall deck 366 or 472. I modified it to run canless. To seal the housing, I had to use a bit of Marine-Tex to keep the seeping from occurring and as it is now will have to redrill a feed hole at some point next week to keep the front seal from weeping.
In any case, I mounted the reservoir after putting washers in the supplied mount. The design assumes the can is rigid enough to tension the bolts at torque when in fact the rigidity is directly related to whether the cap is on or not. With the washers in the bolts are in equal tension all the time and the lower threaded holes in the back of the reservoir base are in shear keeping it in place.
Some have had the clam shell mount fail, I wanted to avoid that.
Here's the mount for the reservoir I burned together. A little tube leftover tubing and some modified angle laying around meant free fifty.
Used the tig, but I stopped and started a couple times trying to work my way around which wasn't the cleanest.
Burned in place.
Reservoir in place and hole cut for intake. I had to move the battery back to fit the newer intake so I needed a new inlet for fresh air.
I removed the inlet tubes to make more room for the width of the intake.
The battery tray got cleaned of the factory mounts and I chopped them up to mount it on the inner fender further back.
After a lot of screwing around sealing the pump it finally works well but is now dripping again. Time for oil passage modification.
Thats a neat little mount. Gonna have this beast done for labor day wheelin, or whens the next scheduled trip for this rig?
Doubtful. Spent the weekend and Mon and Tues moving some new to me equipment. Just getting back on it this morning. Next trip is Moab the last week of September.
I got this thing buttoned up for our early October trip to Utah.
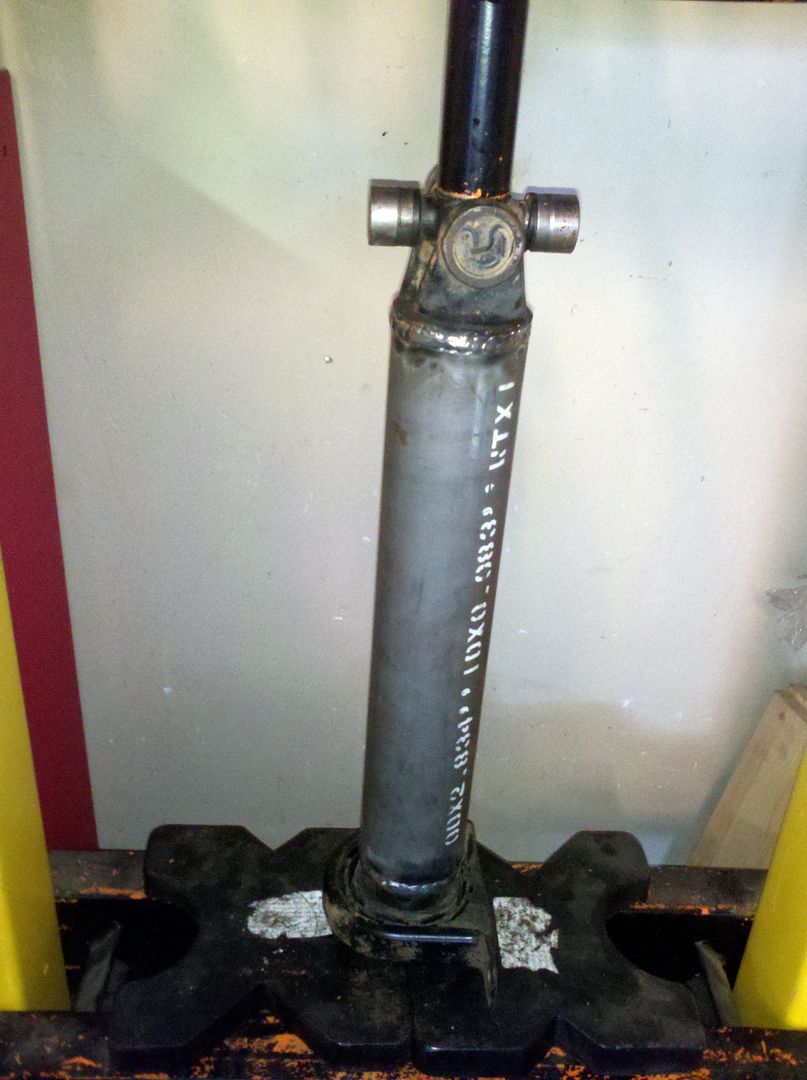
Had to retube front and intermediate driveshafts and after Moab the rear as well.
Fit a 3" system in.
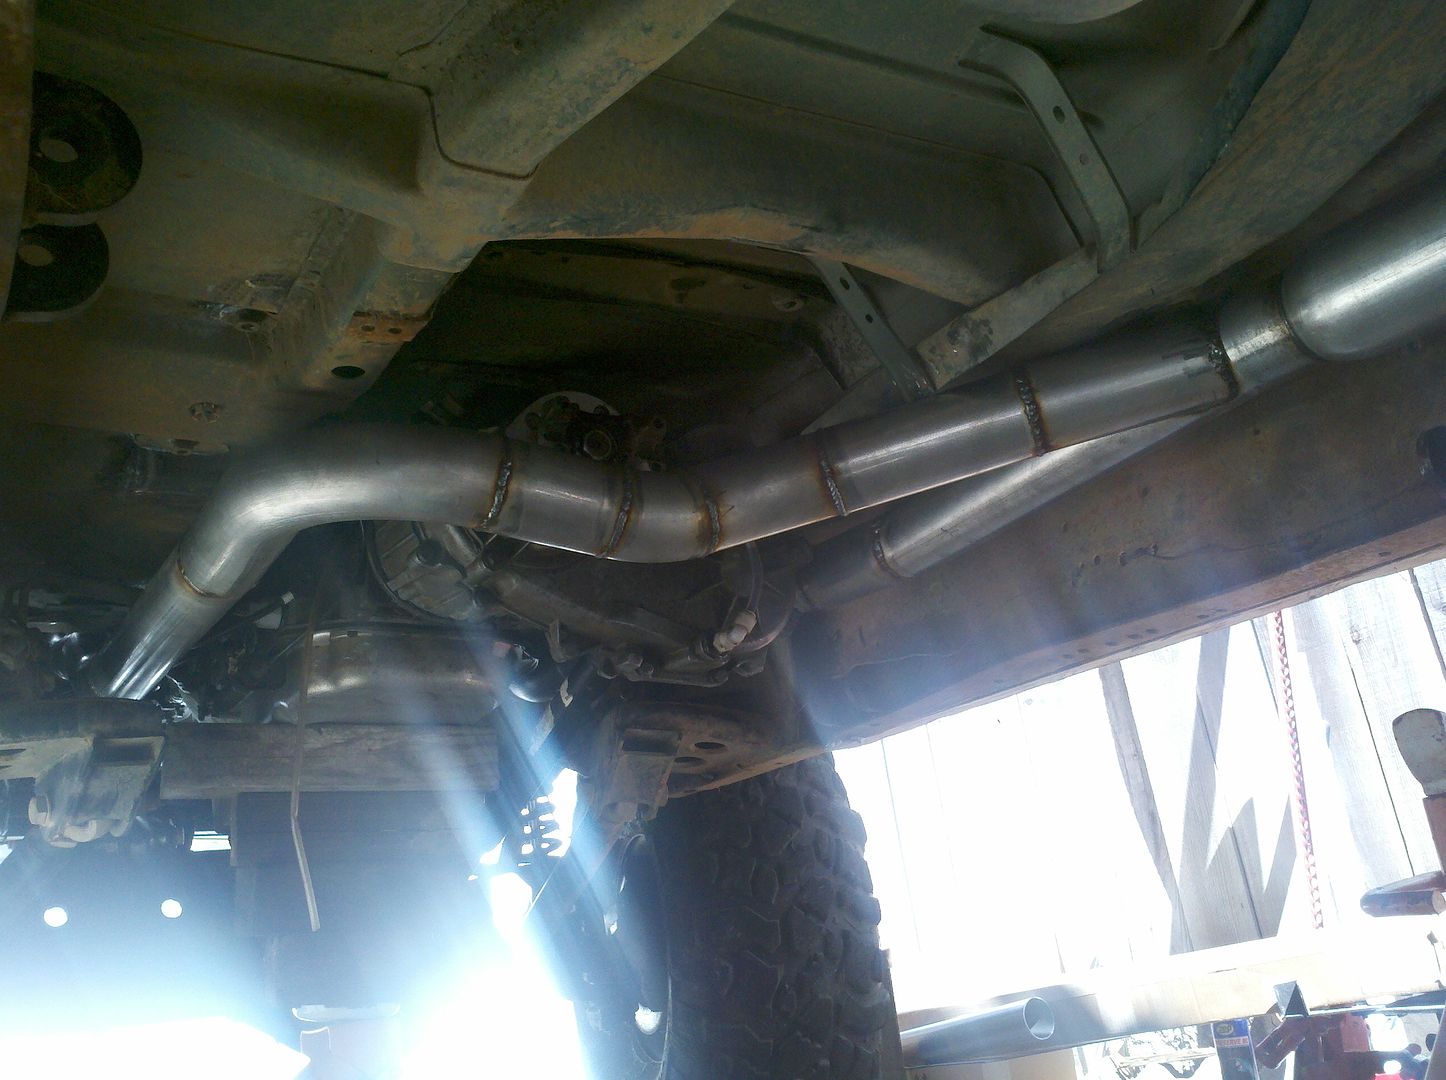
Hate how it sounds through an 18" through muffler. Needs a baffle somewhere as it resonates and sounds awful.
I put the new cluster in, but I have a bad connection I have to trace. I've been using Torque and my Droid in the meantime to keep coolant in check.
Moab.
Broke some stuff headed out.

Broke a center pin and bent the rear driveshaft out there.
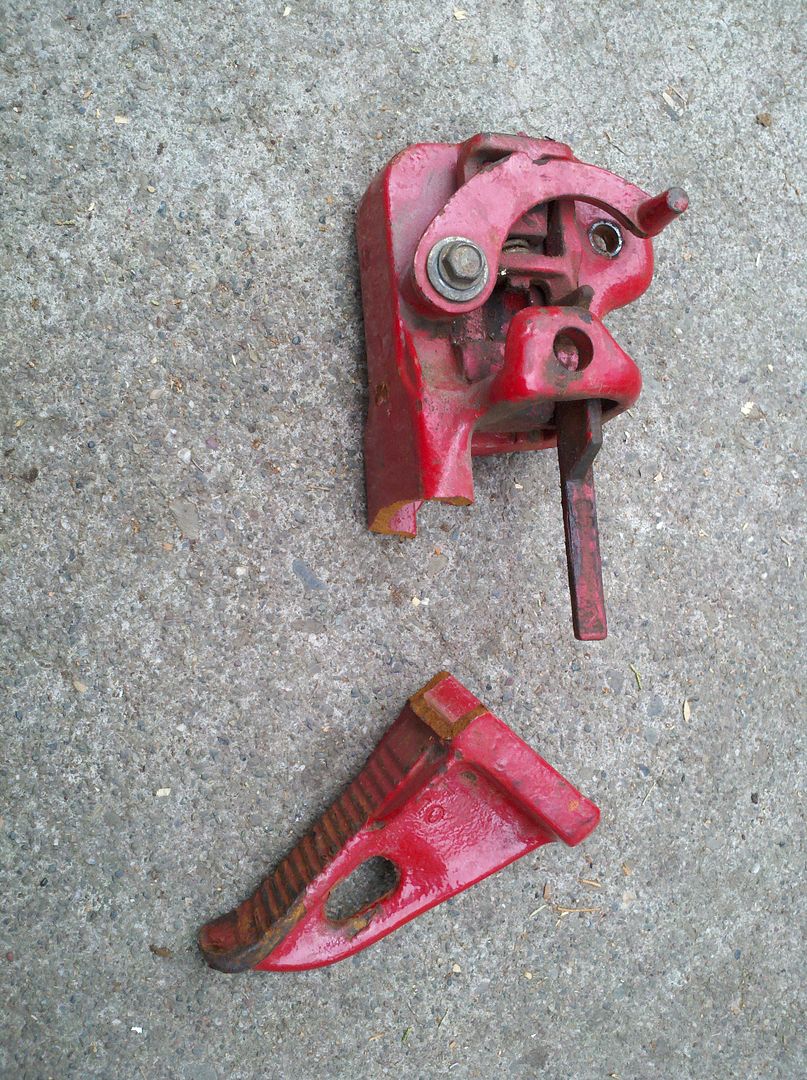
Broke the Hi-Lift trying to straighten the driveshaft.
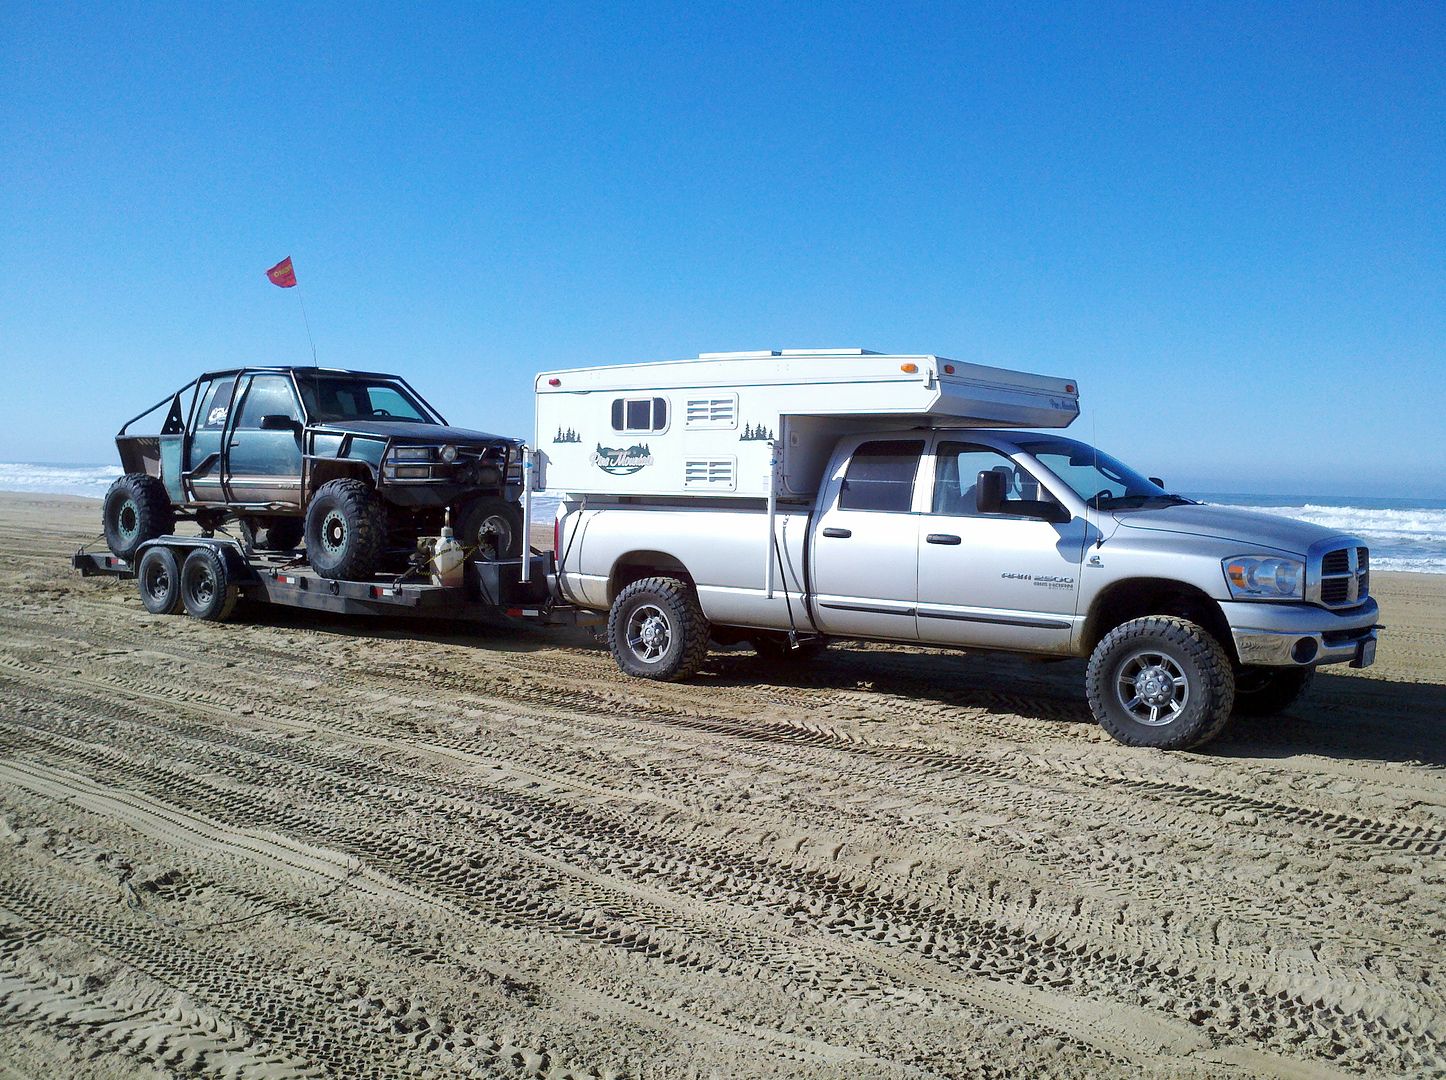
Headed home from Turkey Day in Pismo.
Happy with the power, hate the sound currently and it's still a fat heavy truck. Need buggy'age.
Had to retube front and intermediate driveshafts and after Moab the rear as well.
Fit a 3" system in.
Hate how it sounds through an 18" through muffler. Needs a baffle somewhere as it resonates and sounds awful.
I put the new cluster in, but I have a bad connection I have to trace. I've been using Torque and my Droid in the meantime to keep coolant in check.
Moab.
Broke some stuff headed out.
Broke a center pin and bent the rear driveshaft out there.
Broke the Hi-Lift trying to straighten the driveshaft.
Headed home from Turkey Day in Pismo.
Happy with the power, hate the sound currently and it's still a fat heavy truck. Need buggy'age.
lol, fuck, that's a ton of broke shit! Looks like fun though
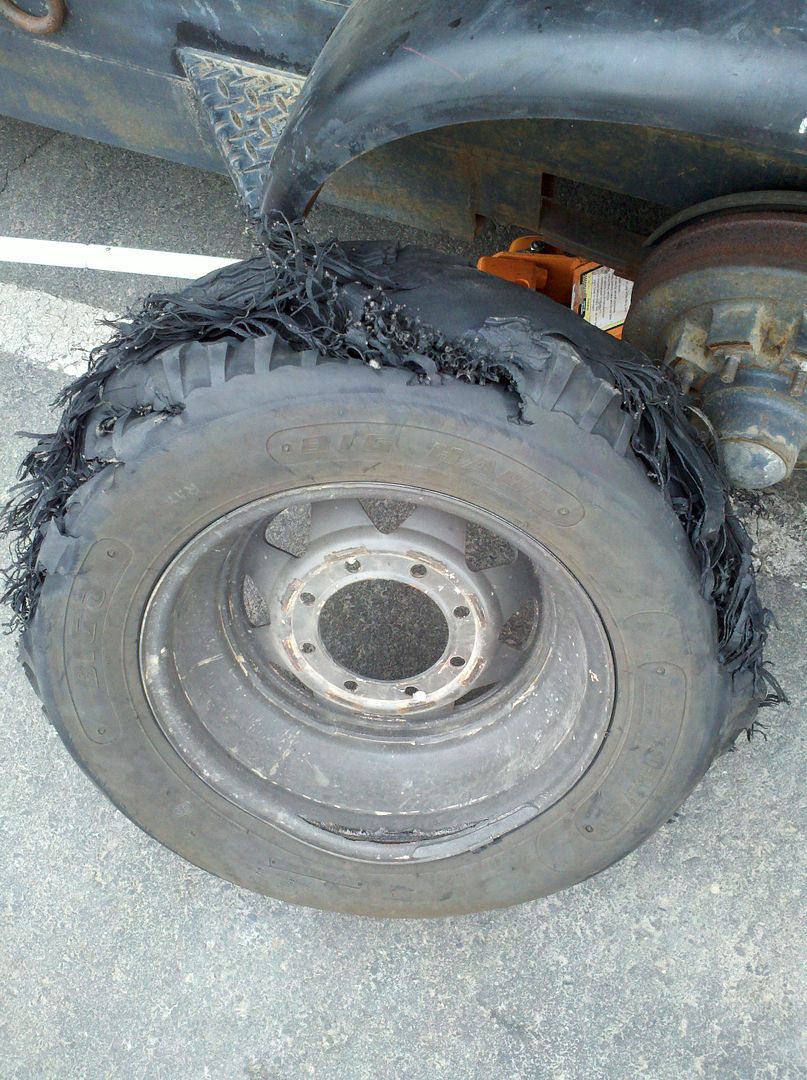
Trailer broke on the way home from Pismo too.
The only expensive thing so far has proven to be the new trailer tire and wheel out on 80. $280 made me kick myself for forgetting my second trailer spare.
prismo has to be a bore with this thing, i would think rocks would be more its pace.
Yea, it's not the most exciting. I don't usually bring it out, but with the bent rear driveshaft in Moab I couldn't ever stretch it's legs so I needed to justify the swap to myself.
I borrowed a friends KTM 530 and the wifey has a CR250 that make the sand a lot more fun.
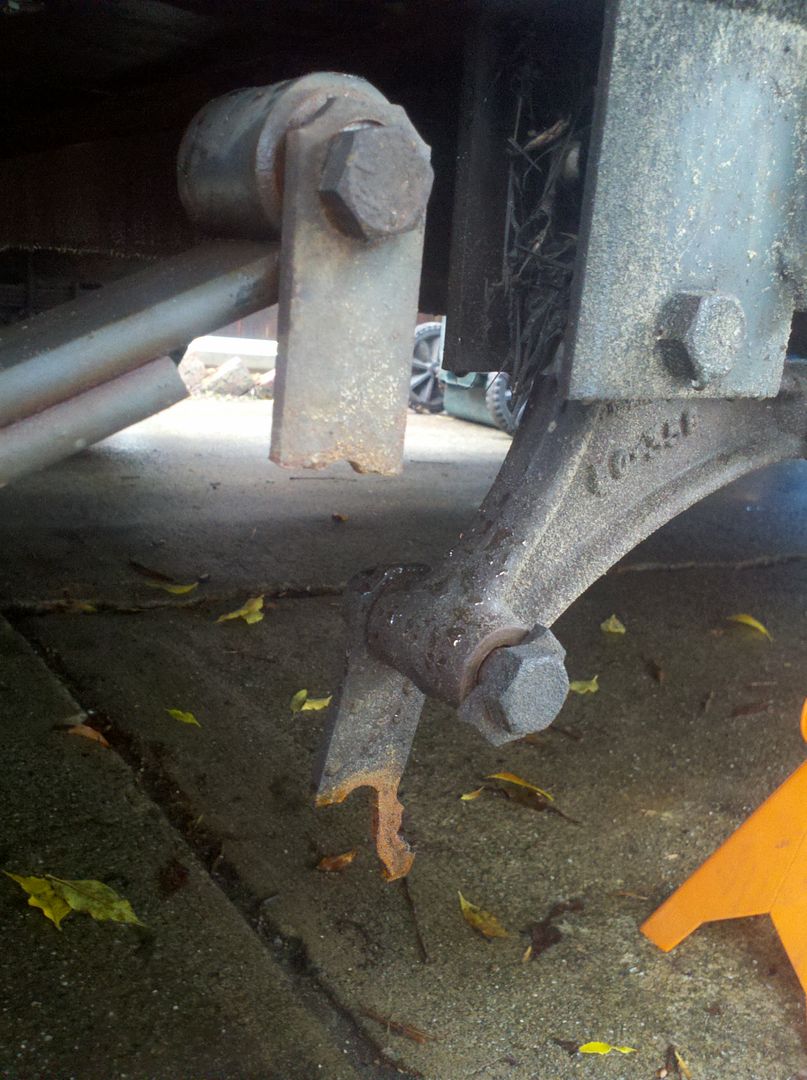
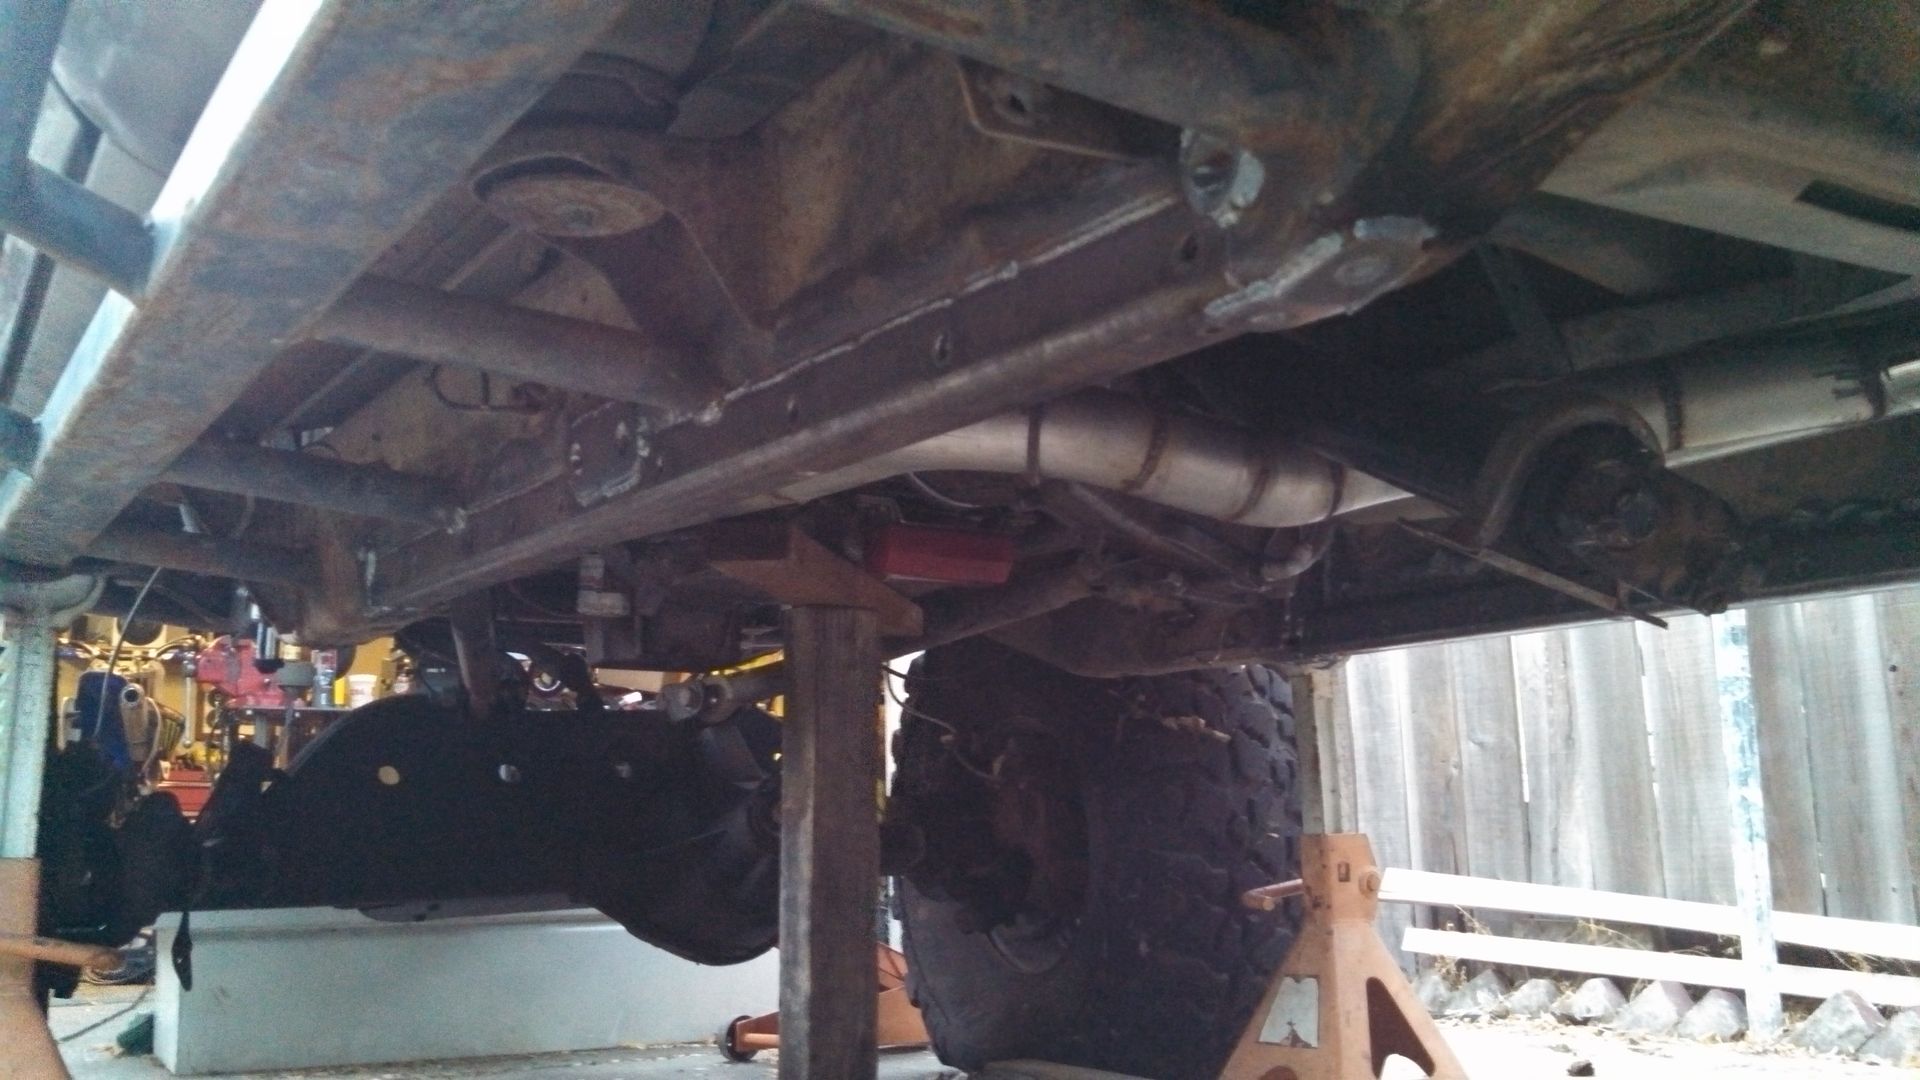
I got annoyed at the frame cracking and the lower link mounts as a result tearing off and rebuilt some things:
Started by cutting out the lower edge of the frame to save some weight:hahano:
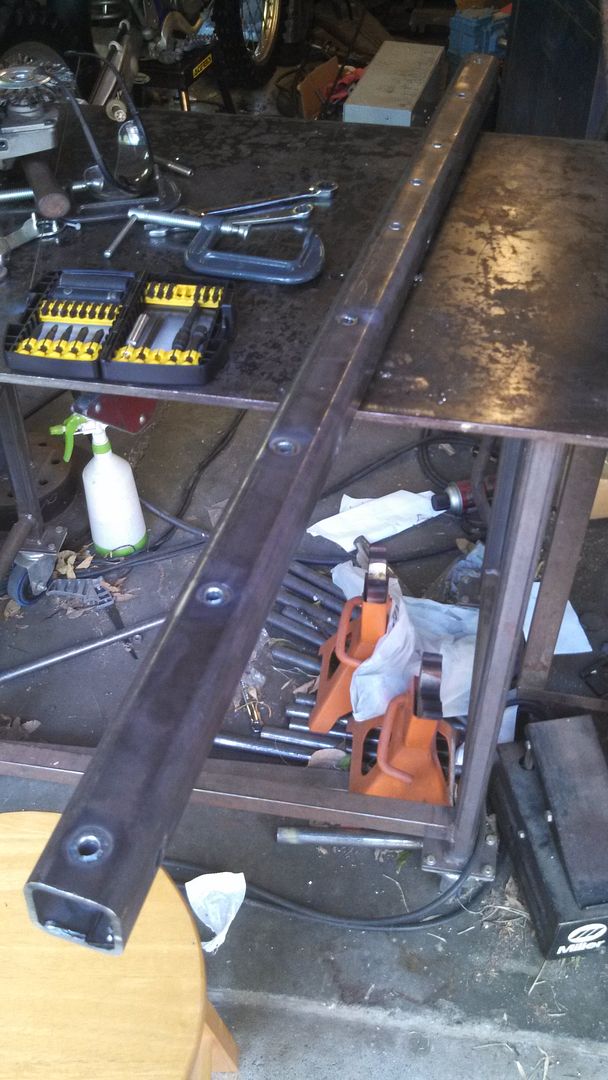
I cut some 2x2 .188w box I had left over from a side job and drilled it for some sleeves I welded in.
Some of the damage I was cutting out.
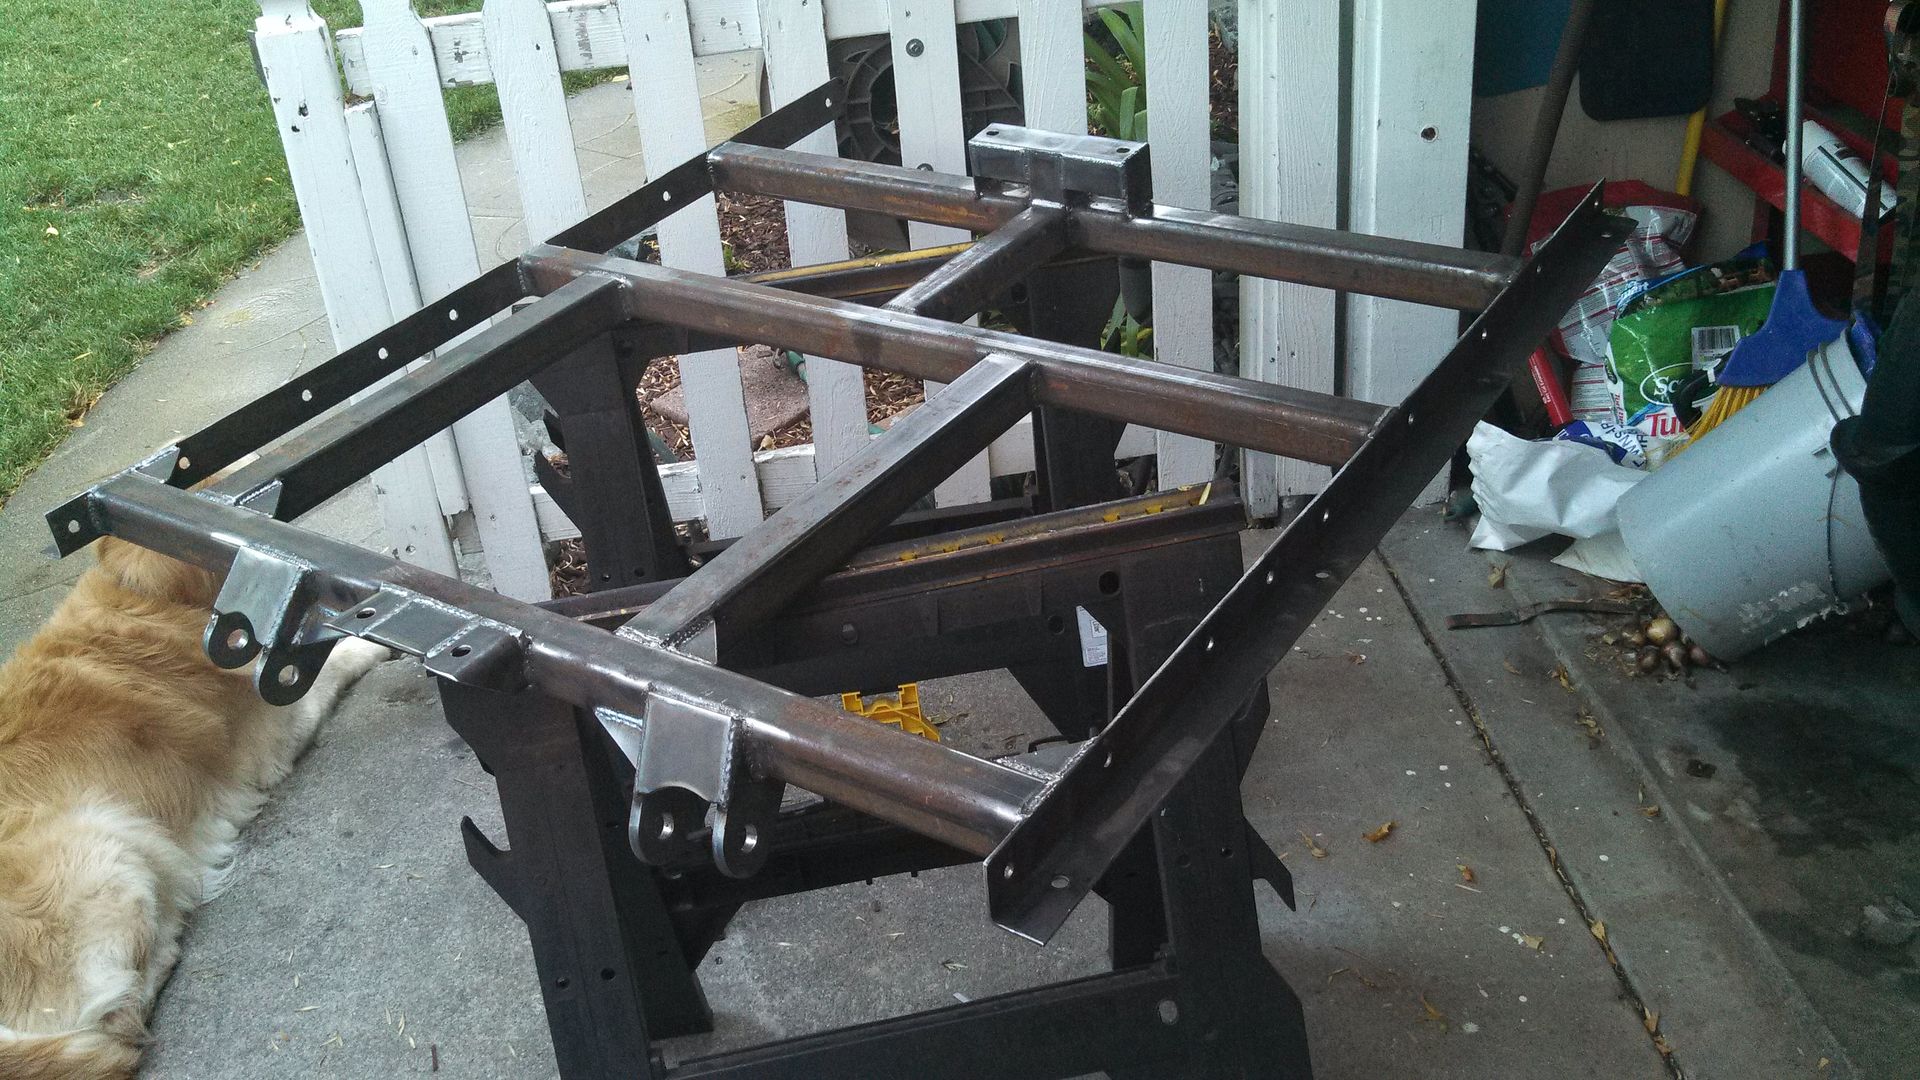
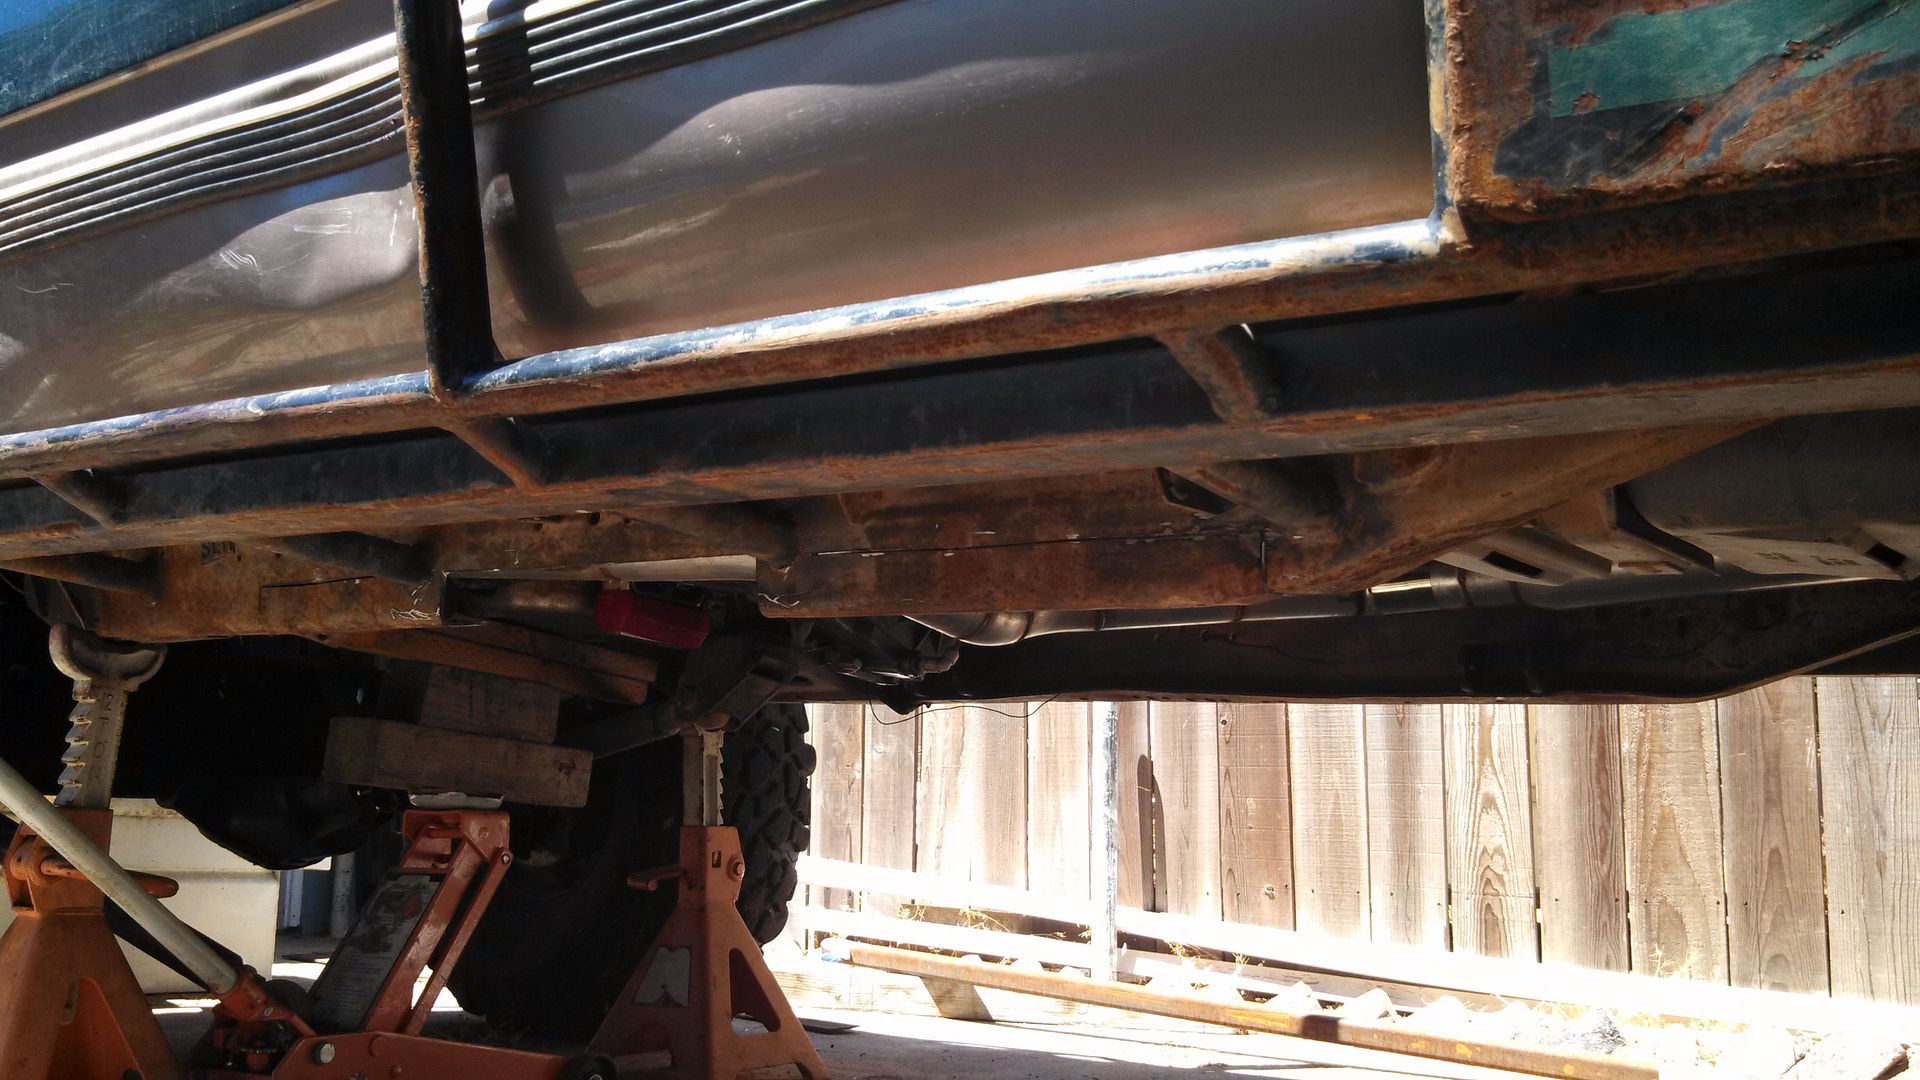
I built a new belly pan with integrated lower link mounts. Mostly built from 2x2 .188w and some 2x2 .120w.

I welded the 2x2 .188w sleeved tubs into the frame.
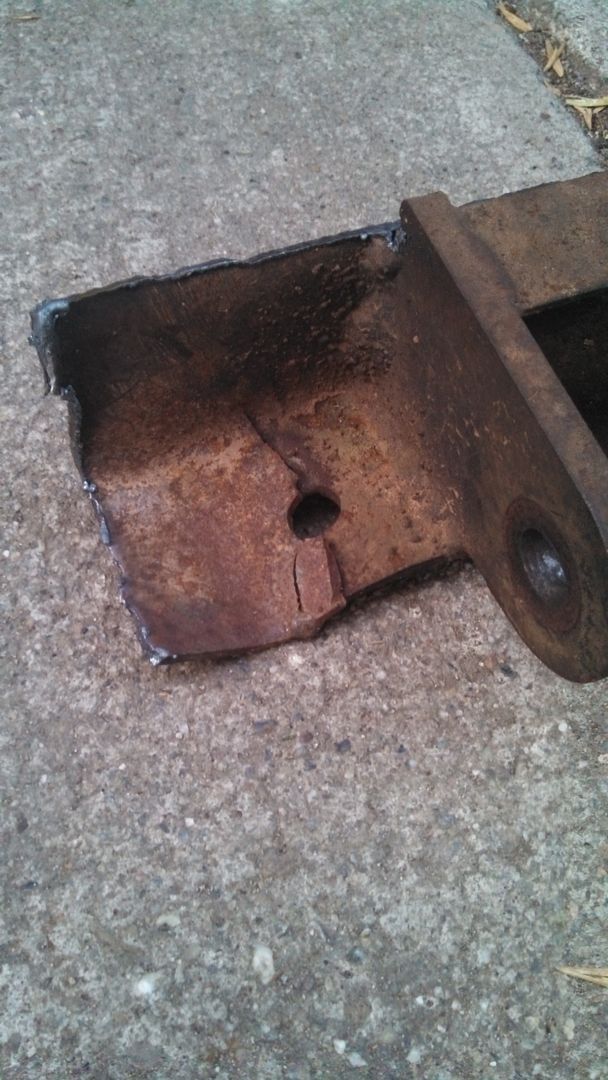
I added fishplates and scabs to reinforce the butt welds and break up the continuous welds.
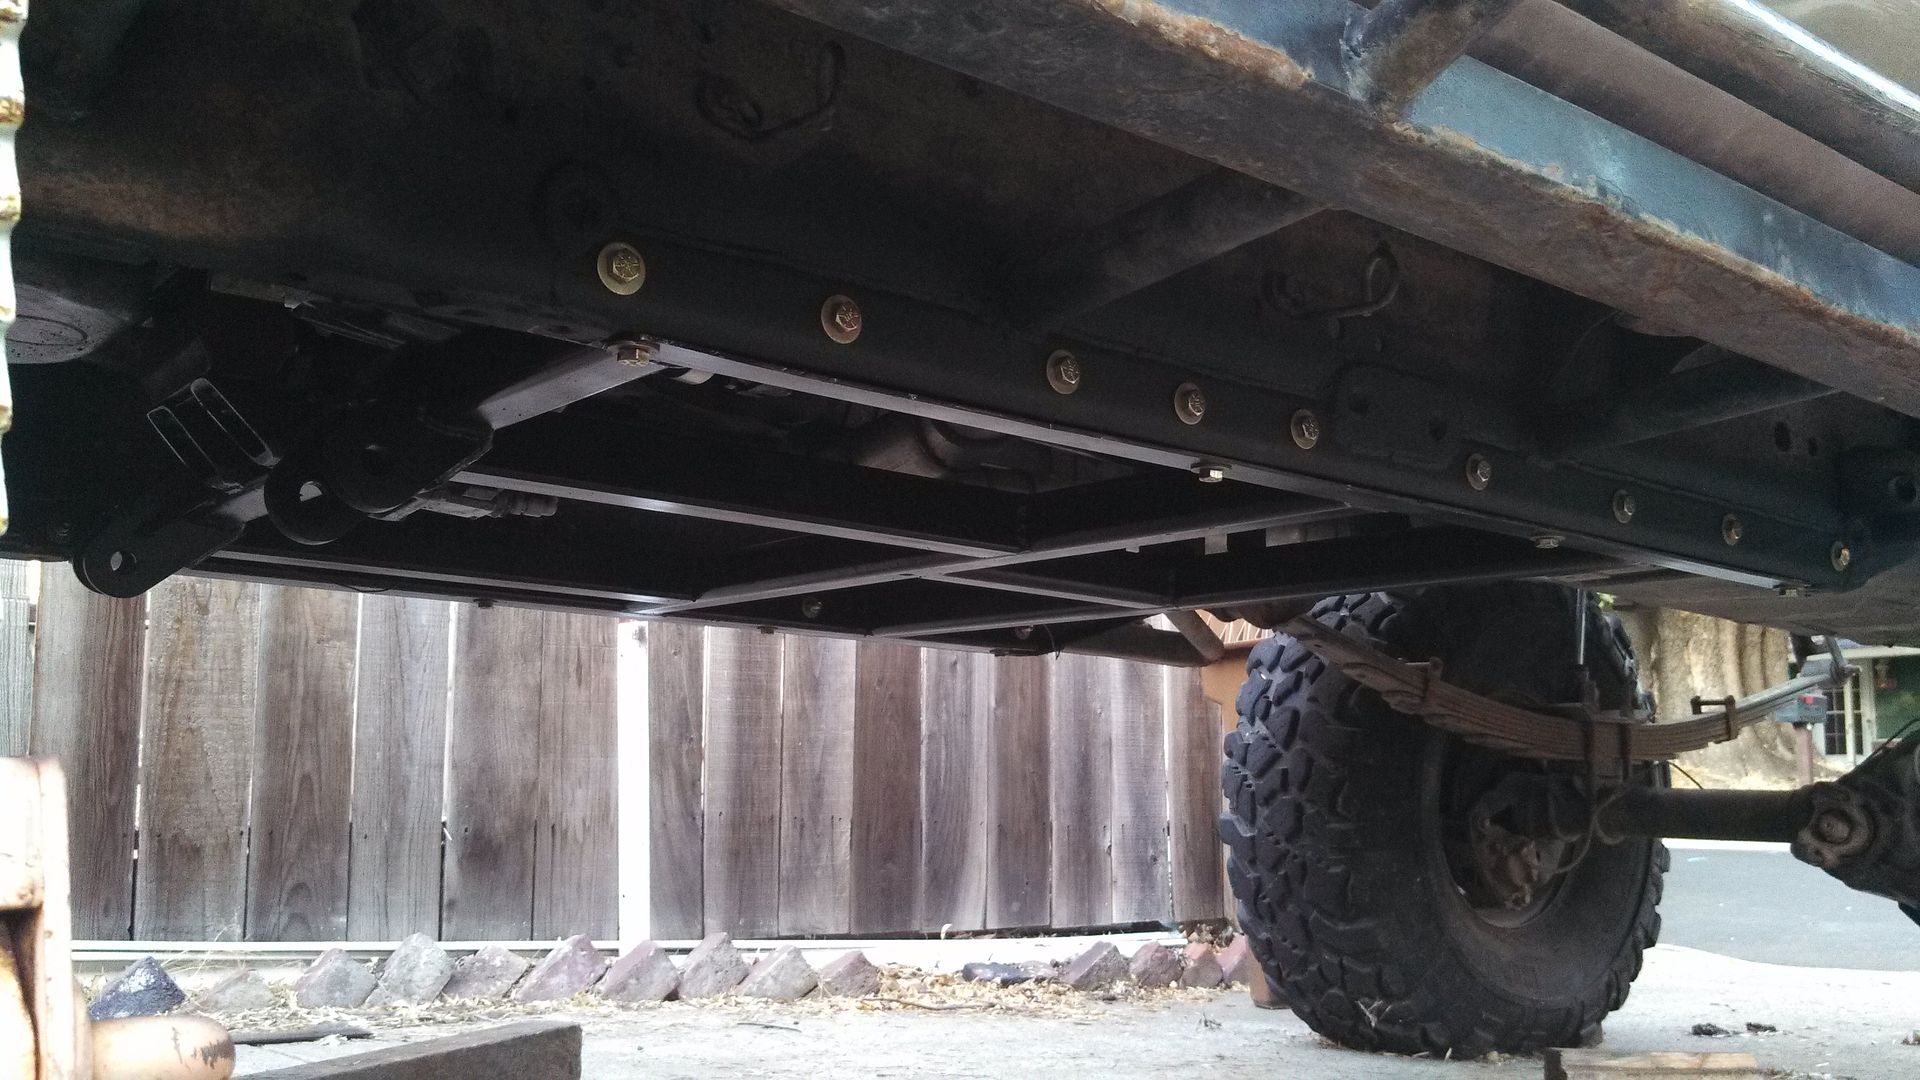
Some paint and the belly was back together.
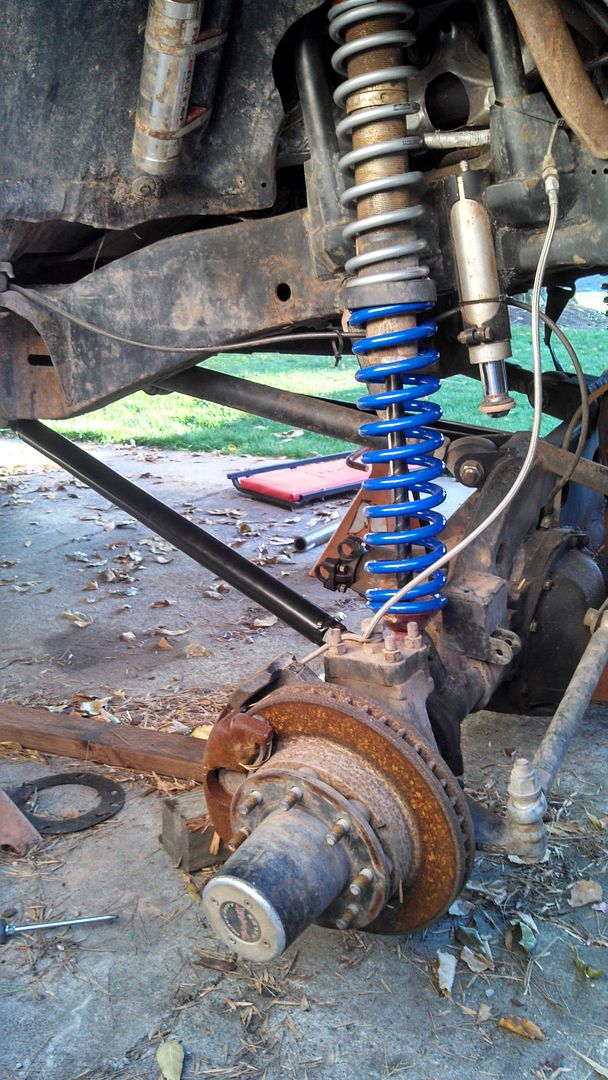
Some new longer, better lower links went in and I put in a coil pairing dropping my combined coil rate a bit but stepping up my preload. I had to use coil compressors just to assemble the coilover. 30" of coil on a 14" SAW doesn't just go on like it does with some other brands.

Started by cutting out the lower edge of the frame to save some weight:hahano:

I cut some 2x2 .188w box I had left over from a side job and drilled it for some sleeves I welded in.

Some of the damage I was cutting out.

I built a new belly pan with integrated lower link mounts. Mostly built from 2x2 .188w and some 2x2 .120w.

I welded the 2x2 .188w sleeved tubs into the frame.

I added fishplates and scabs to reinforce the butt welds and break up the continuous welds.

Some paint and the belly was back together.

Some new longer, better lower links went in and I put in a coil pairing dropping my combined coil rate a bit but stepping up my preload. I had to use coil compressors just to assemble the coilover. 30" of coil on a 14" SAW doesn't just go on like it does with some other brands.
holy shit. why haven't I seen this thread before? badass build!
probably because his last post before today was 12-17-2012, 10:57 AM :rofl:
lol. i followed this back when i used to frequent gmfgtsize
Hell I barely remember seeing it when I first joined up here lol but it is a badass build!
Sent from my SAMSUNG-SM-G900A using Tapatalk