Slow RCSB bagged build

Ok, I currently have mcG 16+ spindles installed static. So I will stick with what I've got right now art arms and kps 5" upper cup. If anything I might go with their weld in upper torsion style bracket which doesn't raise the upper arms. Thanks Peyton for the help!!!

If your already running 16+ spindels or have them ,don't buy the 1.5" upper kit. It will be to much. If you had 17+ go with the new kit ,but still cheaper to go with a 16+,given that bracket is 350+ship

Sent from my HTC One using Xparent BlueTapatalk 2
 
Just use your cups,no need to set up some custom bag brackets unless it's 4wd,or put a big boy kit on it for 24-28s

Use what you have so far with spindles and cups, and your arms.

Sent from my HTC One using Xparent BlueTapatalk 2
 
Sounds good, ill run what I got. No big boy kit for me, I'm just a little asian guy haha
 
Small update

So some of my parts came in this week and I did some work, nothing on the truck as of yet. I'm trying to prefab as much as I can to keep the trucks downtime to a minimum.

These art uppers were sold to me as "brand new, never installed" bottom 2 pics tell the whole story, super sketchy if you ask me. Top 2 pics are what they look like now. boot was sandwiched between the BJ and control arm plate, as soon as i lossened 1 bolt the rest became hand tight. got them dirt cheap so I just changed out the BJs.
58FD2380-7545-4F5D-8632-7EE3C2AA3753-12832-0000069CBE432FB7.jpg


Front upper shock relocators built. 1/4" flat bar scored, bent 90*, and gussets.
7F4F3289-D8BE-4D75-9BFB-5EFA20AE3205-12832-0000069C93460D65.jpg

1DDE6DD2-06FC-40AE-ACF0-F9D399A40BA4-12832-0000069C9B4FB25E.jpg


Accuair sensor mounting plates, gonna try it this way. I figure it will make it relatively easy just to plug weld some studs in and then weld the plate to the frame. Easier than trying to get a wrench on the backside of the frame.
F235EF58-DAAA-49D2-82A7-4CCF81677035-12832-0000069CA8840135.jpg

33C5F19E-5153-43EA-90CC-1625BD5D5E53-12832-0000069CA2B26DC0.jpg


I'm still waiting on fittings to come in, so I can't really start the front till then. I'm planning on running the front on shraders till I can get the air management in. Crappy thing is the elevel won't work unless its fully installed, otherwise it'll throw error codes. So I'll need everything setup before I can even use the valves manually, I might hook up a couple of temp switches just to get by. Also waiting on welding gas, dumbass me made a mistake buying a bottle of pure argon for my millermatic 175 MIG. Apparently MIG does not run well on pure argon for steel, I didn't know this as I've never used MIG before I only stick and TIG at work.
 
Last edited:
NP I got qa1 singles in the back right now and I like em a lot can fine tune to how you want YOUR ride. How do you like the EKMW 2 link vs KP 6 ride quality and reliability wise?
 
Compressor brackets are built, just gotta mock them up on the truck. I put some bushings in the mounting holes in an effort to keep compressor noise to a minimum, we'll see how that works out in due time.

1012C0C4-A3DA-4FDA-895A-4306B7554F83-15642-00000849CC3A0064.jpg
 
Finally some progress on the truck!!! Not a whole lot but its a start, still need to route all the lines and stuff. I want the air management to be up and running before I start on the suspension stuff. On to the pics.

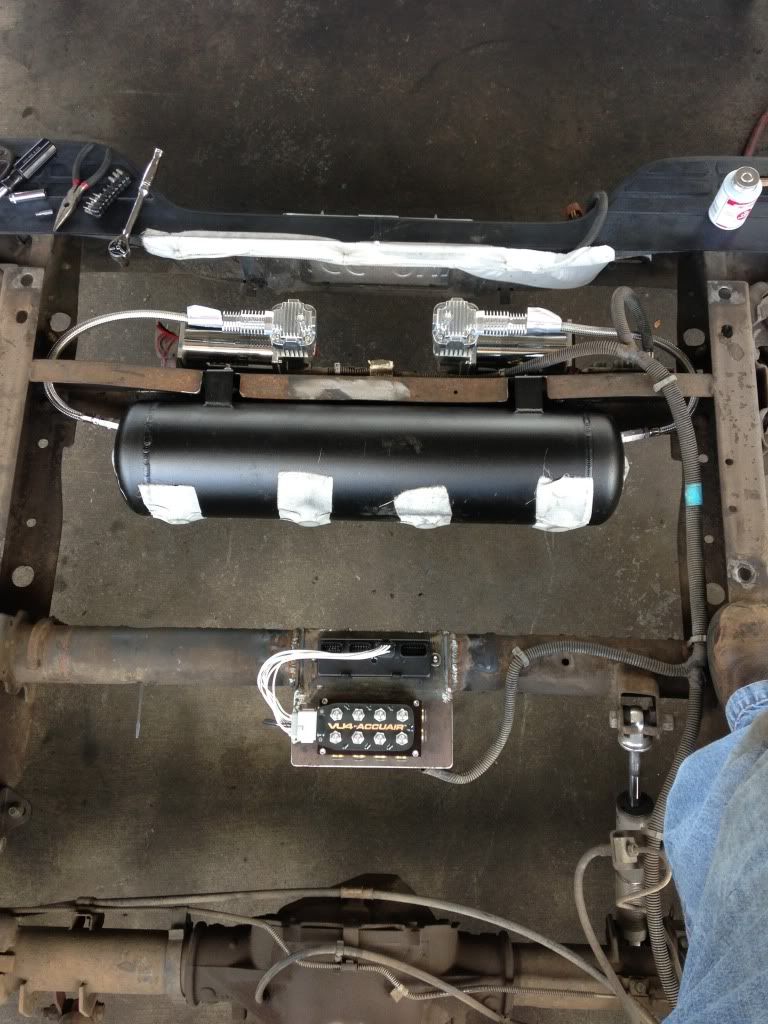
This is how I ended up mounting everything, my goal was to keep everything tucked up as high as possible, don't like the look of tanks etc hanging down. I was able to keep everything above the lowest part of the bumper.
3D113868-EE5B-4EFE-BCFB-A2F9B8C0D6C1-18230-00000987DE506EB9.jpg


6C8EF2C7-F778-43A3-8447-094F81378943-18230-00000987E8D5CEBB.jpg

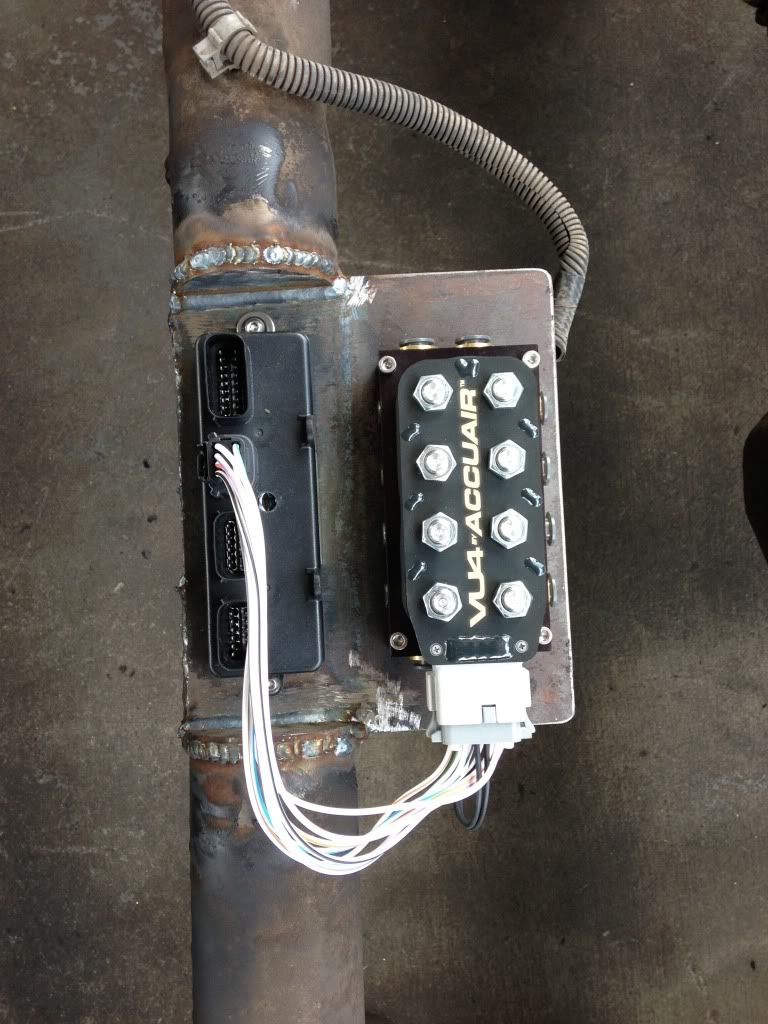
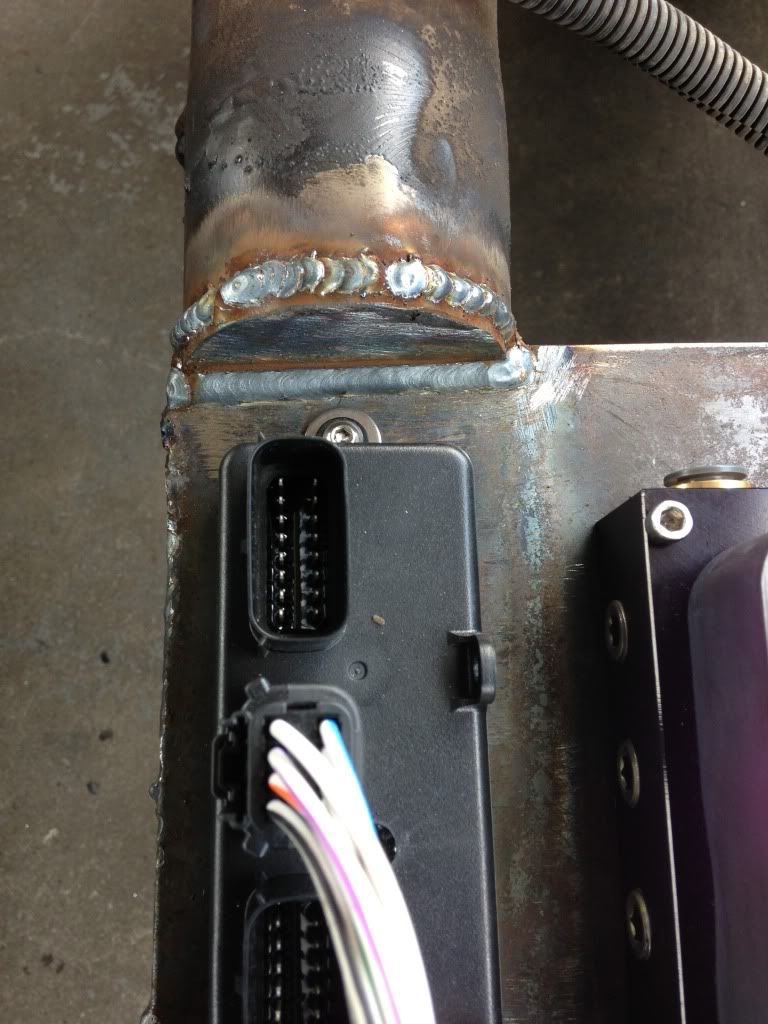
Vu4 and ecu mounted to the tube crossmember, I tried to use what I had available. I think eventually I will cut this out and fab up another. Later I'm probably going to be adding another 5 gal and there's not enough room with that crossmember there. I just cut down half way into the tube and plated it, plenty of room to the bottom of the bed.

28DA70A2-BABD-49E0-A7A5-A8D995E53C96-18230-00000987F05A2A9A.jpg

Another shot of the valve mounting, I ended up tacking the nuts to the backside of the ecu part cause they couldn't be accessed, and I didn't feel like drilling holes on the underneath. Side note, this was my first time really using a mig welder, it welds pretty decent. Definitely easier and faster to use than stick or tig. I'm still a little confused with the settings so I just messed with them till it welded decent.

4B8CE6CE-5C65-4BDE-93D3-D11C42BBEF6E-18230-00000987F9B15D25.jpg

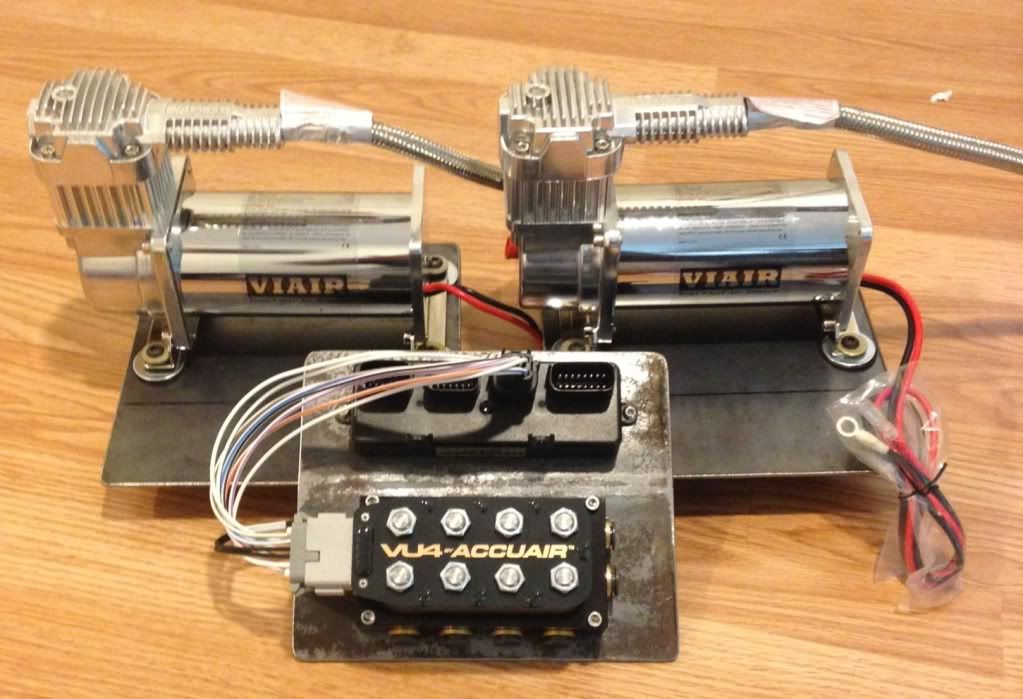
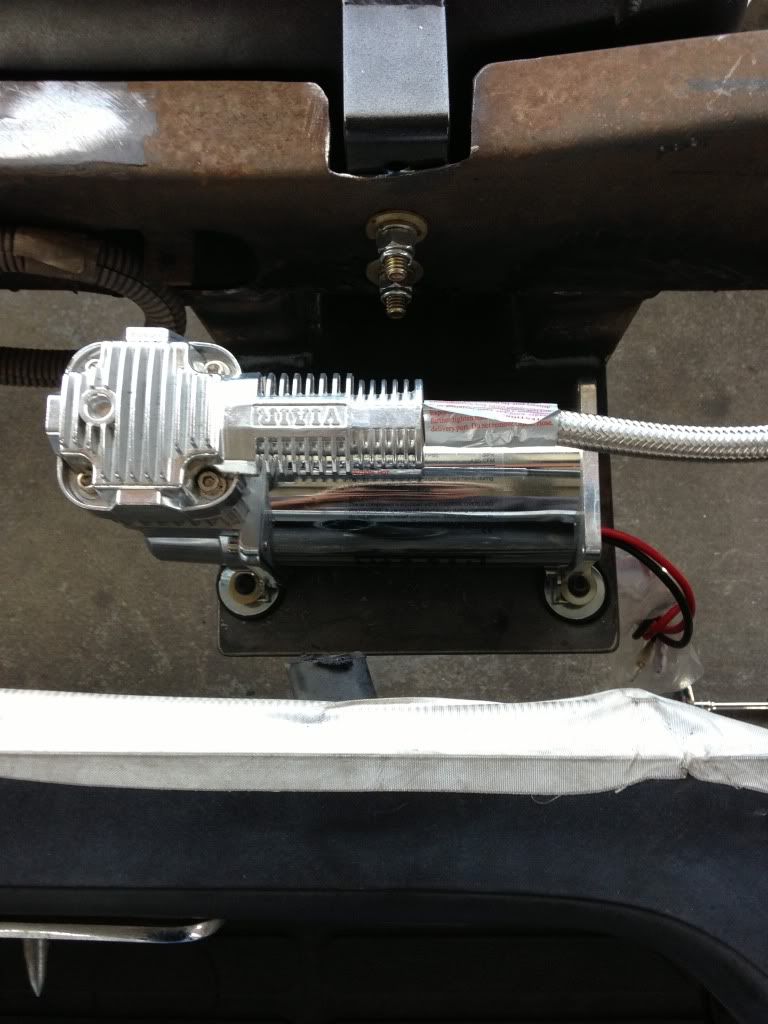
Compressor mounting, can't see real good in this pic but they are dropped down a little with box tube standoffs. Otherwise they would have hit the bed floor pinch weld.

F73B213E-16C9-4548-9F75-8193CE8293E5-18230-00000988048812BF.jpg

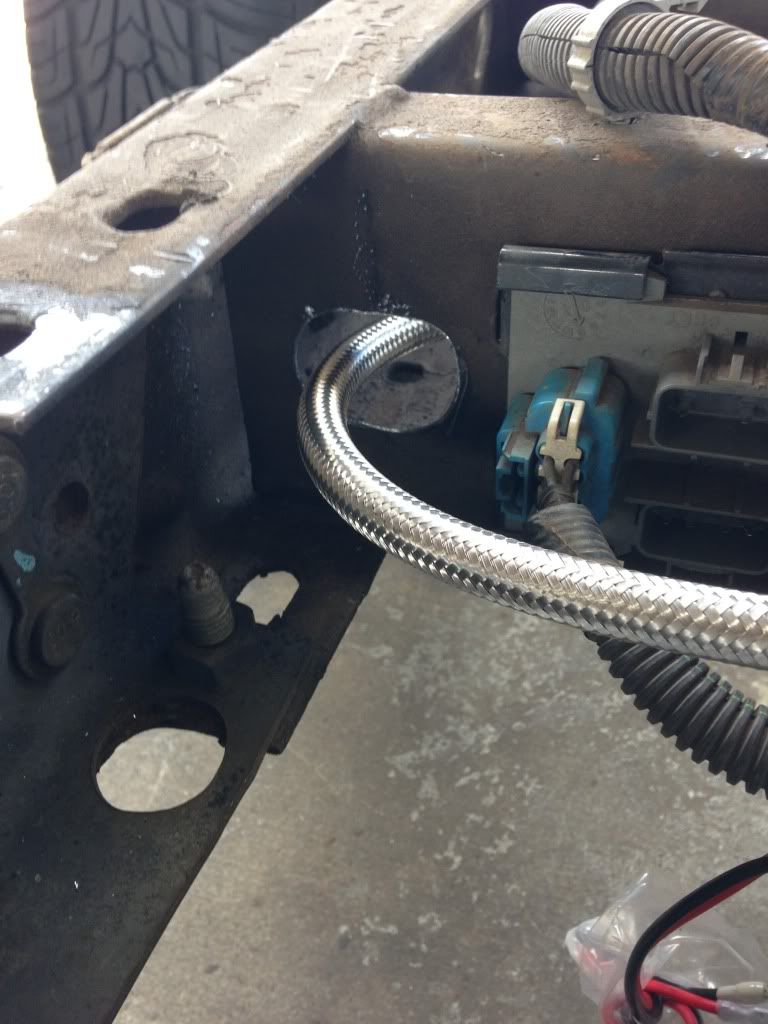
Punched some holes in the crossmember for the leader hoses to pass through, I originally wanted to run water traps on the compressors but the way I mounted the tank wouldn't have enough space. So I think ill just run 1 off the tank to the vu4 block. I'm not too concerned about rust inside the tank as its aluminum and I do have a drain on the bottom port.

That's it for now, ill probably be running lines next so it might be a while before I get to the suspension.
 
Rears are qa1 singles, and planning to transfer them to the 6 link. Should work I'm pretty sure
 
Another small update, just setup the wiring in my engine bay for comps, fused distro block, dr44g alternator, all 0 awg, and a die hard platinum battery. Like a big 3 minus the ground...which I will eventually do.

333604B8-35A3-441A-B9A5-52C91AAE88CE-21116-00000B34A178997B.jpg
 
Is this bag angle wired or is this normal with kp cups?

Got the front end partly finished, driveable at least. Still need to mount shocks. So far I've only drove ~60 miles with no breakdowns so far.

I'm not really diggin these kp cups, is the angle of the bags supposed to be that extreme at ride height with these? The bags are rolling over and touching the upper cup. I set the lower mounting hole to where the bags are nice and flat laid out, consequently this landed right where the coilovers would normally mount on these particular arms, so that made me think it was in the right location or at least in the ball park. They're just kissing sitting there but I'm thinking with constant movement it will cause rubbing. I'm not sure if its cause the dominator d2500's top cap is quite a bit smaller than the kp cup in diameter? If I switch to slams I'm assuming they might fix this issue. Is the solution to drill the lower mounting hole closer to the frame or ball joint? If my logic is correct closer to the frame will straighten it out some?

I really like the specialty suspension torsion bracket, the cups are so cumbersome messing with the fittings and mounting bolts inside that small area and I don't like the airline coming out of the top. I'm thinking tomorrow I will fix up those lower mounting holes, closer to the frame. And order the ss torsion bracket and some re7s.

Drivers side
D815C5F6-96CD-4A5D-81E8-164E8B0DA447-23421-00000C87F8A405FB.jpg


Pass side much worse
BE0C5E1A-F29D-4050-A118-A6F5A60C2B37-23421-00000C8810AE3215.jpg