
I bought 2 sets of LED's. The first set were standard blue 5mm dome shaped housings (30° viewing angle). The second set i bought were blue 5mm flat top housings (rated at around 110-130° viewing angle)
What i did to diffuse the light on the dome shaped ones was to take a palm sander with 120 grit sandpaper attached, and 'sand' the housings down to were there was no shape of a dome, basically flat. My consensus was that by doing this, it seemed to be brighter/more uniform than the flat top LED's, meaning it 'flooded' more light in a given area, whereas the flat tops had a noticable ring where the light stopped when putting these side by side against a flat surface for testing. Both are rated at 5000mcd. I think anything more than 5-8000mcd may be too bright/distracting in your interior. You're looking for color, not blindeness.
Anyways onto the pictures, and ill explain what i have done in each one. The formula to use for finding out what resistor value you need and the wattage is very simple. You simply use Ohms Law:
R=(Vs - VL) / I
R = Resistor value
Vs = Voltage supply (Usually 13.8v average)
VL = LED voltage (If doing more than 1 LED in series, add their Vl together)
I = LED current (mA's)
Now to calculate what ohm resistor you need simply take the voltage drop and multiply it by the current rating. Example:
3 blue LED's connected in series at 3.2v with a 20mA current draw. Extended calc:
R = [13.8 - (3.2+3.2+3.2)] / .02
R = (13.8 - 9.6) / .02
R = 4.2 / .02
R = 210
The closest resistor value you will find will be a 220ohm. Use this value.
Now multiply the total LED voltage and the current draw together
9.6 * .02 = 0.192
You would be fine with a 1/4w resistor. So for 3 blue LED's at 3.2V and 20mA you will need to wire in a single 220 ohm 1/4w resistor. Now if you wanted to lower the current rating to 15mA and drop the brightness of the LED, just factor in .015 in the I column.
You could also wire them in parallel, meaning you wire 1 resistor up to all positive leads of each LED, however it is not recommended unless every LED is the same exact value. On a PCB such as the lower part of the A/C panel you could wire in 1 resistor, but usually the wattage is a little higher, such as 1/2w or even sometime 1w. I wont get into finding this, ill just say that on a lower A/C panel you could solder a resistor in the + wire that feeds the light circuit. This value is: 150ohm 1w. The resistor needs to dissipate a lot of heat in exchange for powering those LED's.
Note: If you want to dim down the LED's, drop the mA rating, if its rated at 24mA and you want to drop it down to 18-20, then factor that number in the I column to find the correct resistor value.
Note II: If you want an easy way to calculate...heres a link
Current limiting Resistor calculator for leds
Onto the pics:
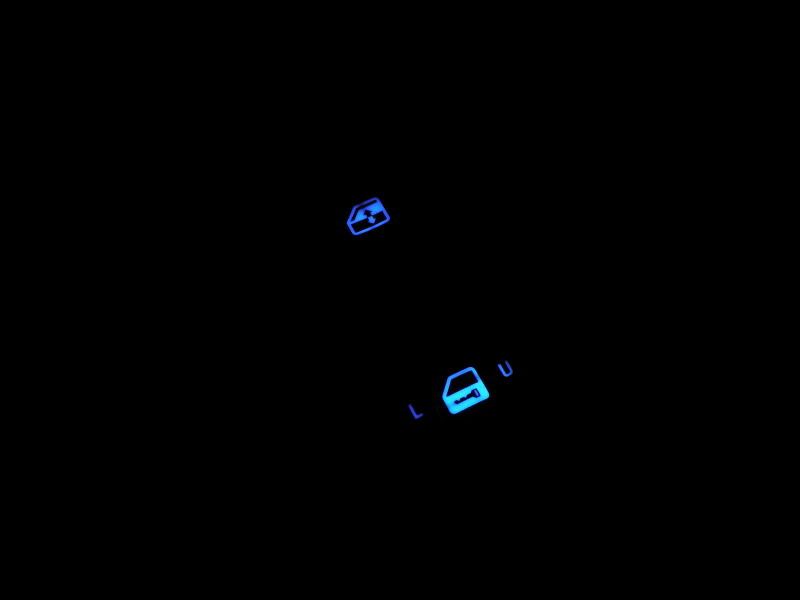
Here first we have the door controls. The window switches only need 1 LED per switch, however i did 2 in the lock/unlock switch. I wired the LED's in 2 pairs both in series.
Value: 390ohm 1/4w.
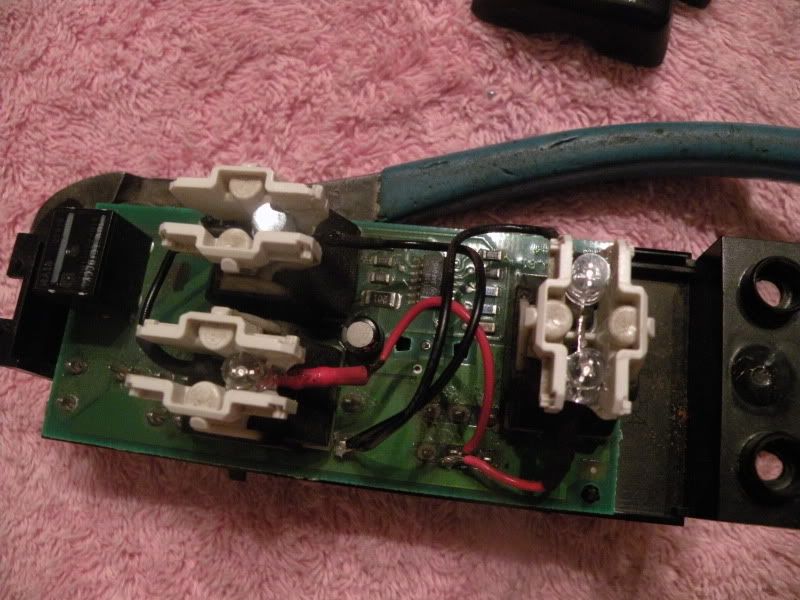
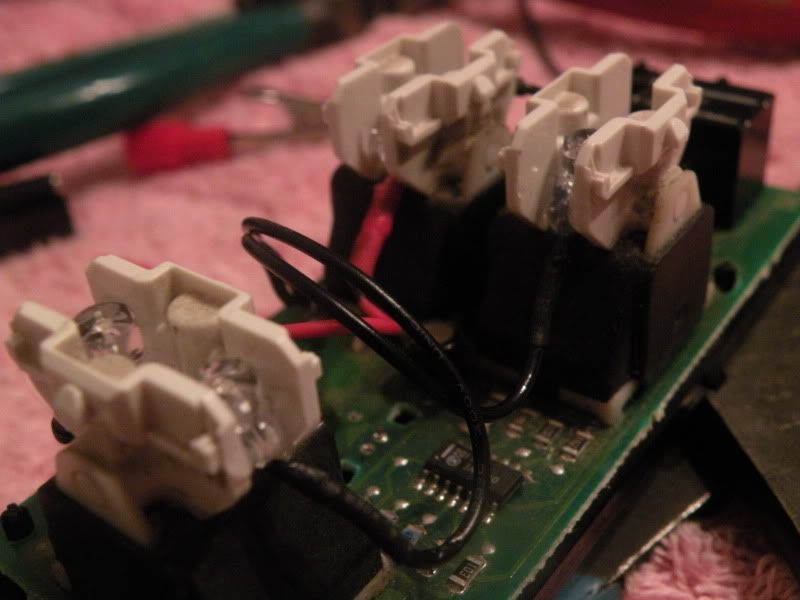
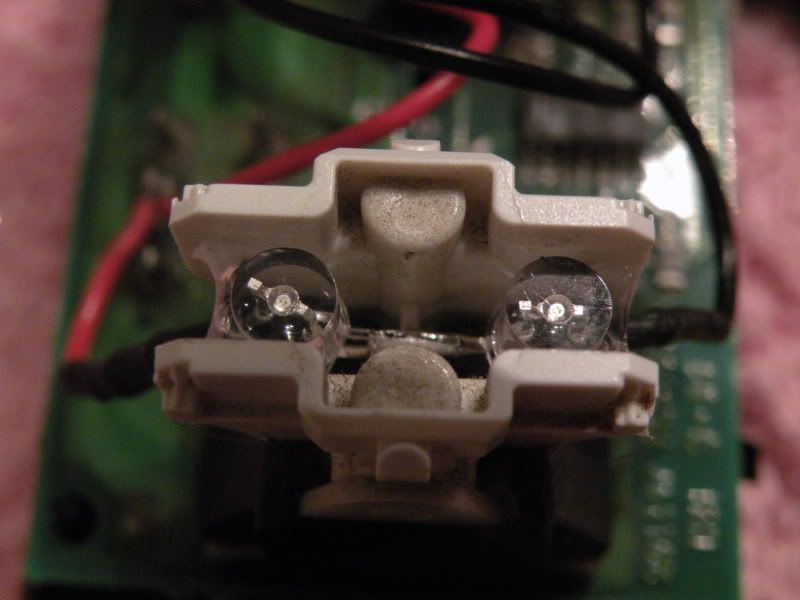
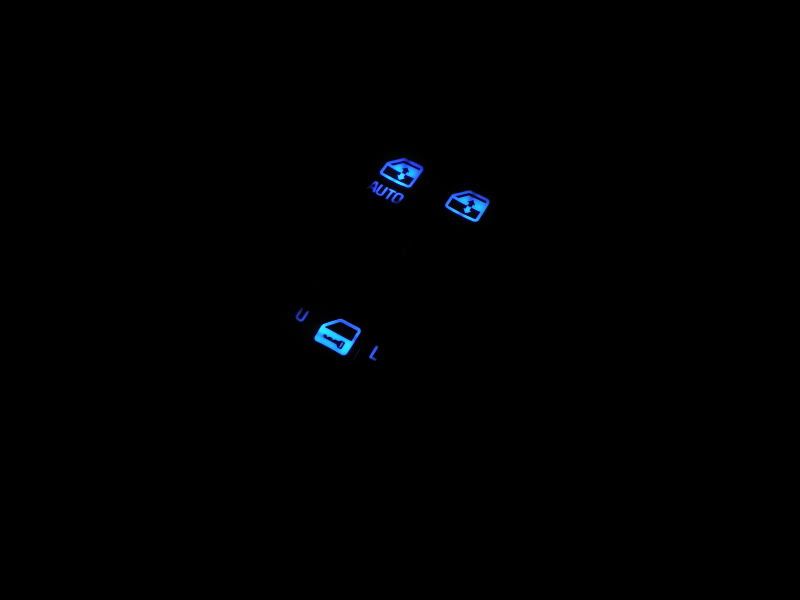
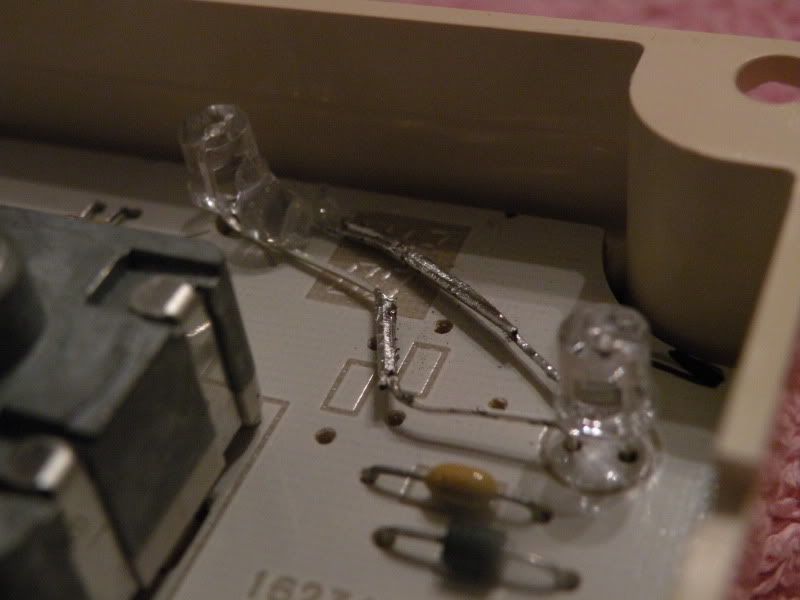
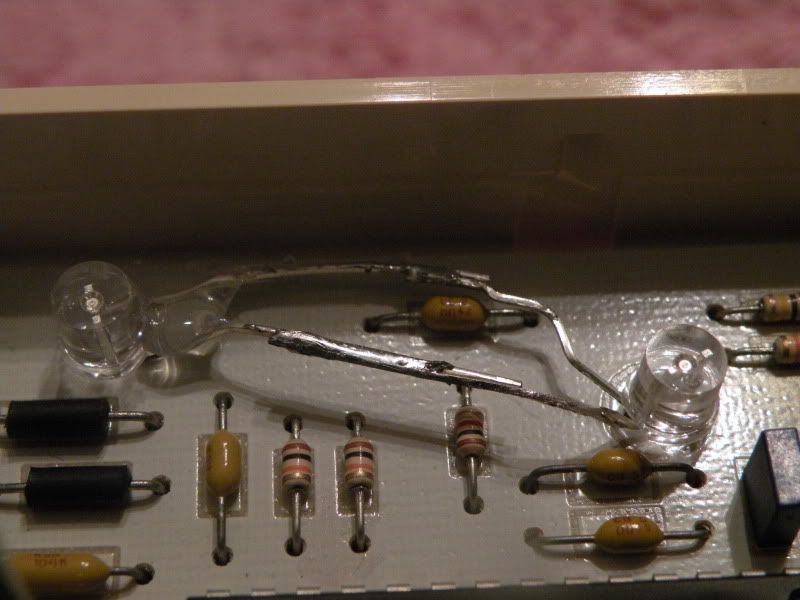
A/C panel. Like stated i am a perfectionist, just soldering in a single LED in each stock location of the previous bulb wasnt cutting it. Needed to be more uniform. There are 4 bulbs from the factory, i simply put 1 more LED in between each set wired in series.
Value: 220ohm 1/8w (All i have are 1/4w and 1/2w....a 1/4 will be fine)
Onto the cargo light....this one was easiest...took me all of 10 minutes. You need 1 resistor valued at 330ohm 1/4w (for 24mA or to dim it down to 20mA use a 390ohm 1/4w)
http://i6.photobucket.com/albums/y2...st blue led's use a 3.2 average voltage draw.
What i did to diffuse the light on the dome shaped ones was to take a palm sander with 120 grit sandpaper attached, and 'sand' the housings down to were there was no shape of a dome, basically flat. My consensus was that by doing this, it seemed to be brighter/more uniform than the flat top LED's, meaning it 'flooded' more light in a given area, whereas the flat tops had a noticable ring where the light stopped when putting these side by side against a flat surface for testing. Both are rated at 5000mcd. I think anything more than 5-8000mcd may be too bright/distracting in your interior. You're looking for color, not blindeness.
Anyways onto the pictures, and ill explain what i have done in each one. The formula to use for finding out what resistor value you need and the wattage is very simple. You simply use Ohms Law:
R=(Vs - VL) / I
R = Resistor value
Vs = Voltage supply (Usually 13.8v average)
VL = LED voltage (If doing more than 1 LED in series, add their Vl together)
I = LED current (mA's)
Now to calculate what ohm resistor you need simply take the voltage drop and multiply it by the current rating. Example:
3 blue LED's connected in series at 3.2v with a 20mA current draw. Extended calc:
R = [13.8 - (3.2+3.2+3.2)] / .02
R = (13.8 - 9.6) / .02
R = 4.2 / .02
R = 210
The closest resistor value you will find will be a 220ohm. Use this value.
Now multiply the total LED voltage and the current draw together
9.6 * .02 = 0.192
You would be fine with a 1/4w resistor. So for 3 blue LED's at 3.2V and 20mA you will need to wire in a single 220 ohm 1/4w resistor. Now if you wanted to lower the current rating to 15mA and drop the brightness of the LED, just factor in .015 in the I column.
You could also wire them in parallel, meaning you wire 1 resistor up to all positive leads of each LED, however it is not recommended unless every LED is the same exact value. On a PCB such as the lower part of the A/C panel you could wire in 1 resistor, but usually the wattage is a little higher, such as 1/2w or even sometime 1w. I wont get into finding this, ill just say that on a lower A/C panel you could solder a resistor in the + wire that feeds the light circuit. This value is: 150ohm 1w. The resistor needs to dissipate a lot of heat in exchange for powering those LED's.
Note: If you want to dim down the LED's, drop the mA rating, if its rated at 24mA and you want to drop it down to 18-20, then factor that number in the I column to find the correct resistor value.
Note II: If you want an easy way to calculate...heres a link
Current limiting Resistor calculator for leds
Onto the pics:
Here first we have the door controls. The window switches only need 1 LED per switch, however i did 2 in the lock/unlock switch. I wired the LED's in 2 pairs both in series.
Value: 390ohm 1/4w.
A/C panel. Like stated i am a perfectionist, just soldering in a single LED in each stock location of the previous bulb wasnt cutting it. Needed to be more uniform. There are 4 bulbs from the factory, i simply put 1 more LED in between each set wired in series.
Value: 220ohm 1/8w (All i have are 1/4w and 1/2w....a 1/4 will be fine)
Onto the cargo light....this one was easiest...took me all of 10 minutes. You need 1 resistor valued at 330ohm 1/4w (for 24mA or to dim it down to 20mA use a 390ohm 1/4w)
http://i6.photobucket.com/albums/y2...st blue led's use a 3.2 average voltage draw.
Last edited: