
This is an old writeup, but will be helpful if you choose to do a LED swap in your lighted units.
K..I wanted to do the LED interior change over, had a whore of a time finding info, and only a few select have done it. SO i bought 200 LEd's, pounds of resistors and set out on a mission. Here is a How to on how to do it. PM me or post questions...
Truck: 99 RCSB Loaded.
Parts Needed: Two Small Screw Drivers, Soldering Iron, Knife, Plyers, and Side Cuters.
Supplies Needed: 5mm or 3mm LED's, I used mainly 5mm normal LED's. Resistors go as follows
1 bulb takes a 670ohm resistor
2 bulbs takes 460ohm
3 bulbs take 330 or higher (this is for Blue Bulbs, all color require different)
Solder, Shrink Tube, CHROME DUCT TAPE!!!!!
!!!!!!!!!!PATIENCE!!!!!
WHEN DISMANTLING SWITCHES ETC, BE CAREFUL TO NOTICE HOW THEY COME APART..LOTS OF SPRING AND OTHER FUN STUFF FALLS OUT!
The CHROME DUCT TAPE WORKS AMAZING FOR DIRECTING LIGHT WHERE YOU WANT IT TO DO, and ELIMINATING HOT SPOTS
First thing, take door panels and Dash trim bezel off. I started with the Drive side window, and lock first, and worked my way left through the truck.
Here is a picture of the Window switch apart. Just look at the housing and you will notice small black wedge clips that hold the two pieces together. All of the switch mechanism use a clip device like this. I used two small screw drivers to pry them apart. Be careful not to stress the Plastic.
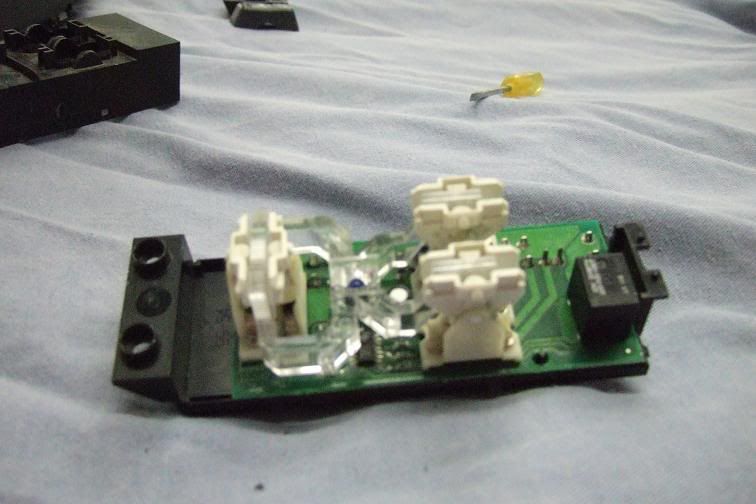
Look below; you will see a big clear shaped plastic piece. This is the Light channels...the bulbs shines, and admits light through the plastic to come to the face of the switches. Take the two small screwdrivers and pry the little feet in on the light channel so that it comes off the board. Now remove the Factory bulb....cut it or smash it off.... Now take your LED of Choice, Solder in the CORRECT resistor anywhere in the circuit. Solder one side to the board, and the other to the bulb, and the other bulb Lead to the board. You have just complete one bulb. Reinstall the plastic channel piece and your done (test before you put the entire switch back together.
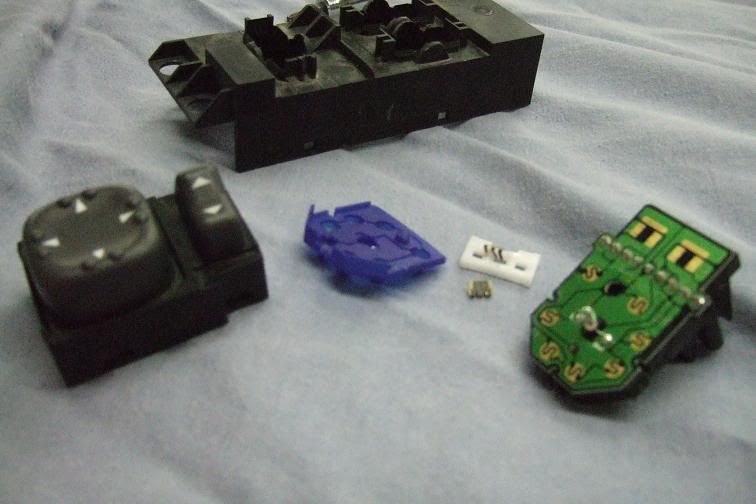
Here is the Power Mirror Switch, Worse One Yet. This is what it looks like apart. Look at it...Remove old bulb, wire in resistor, and reassemble. Cut the rubber blue piece so that the new LED will stock through it…position the LED in a place where it doesn’t get in the way. It sound simple, but that is it. Takes time...but when you get it apart you will see what needs to be done....
Next is the Light Switch. This one is full of little parts...be careful, and can be tricky. Below you can see me dismantling it...look...
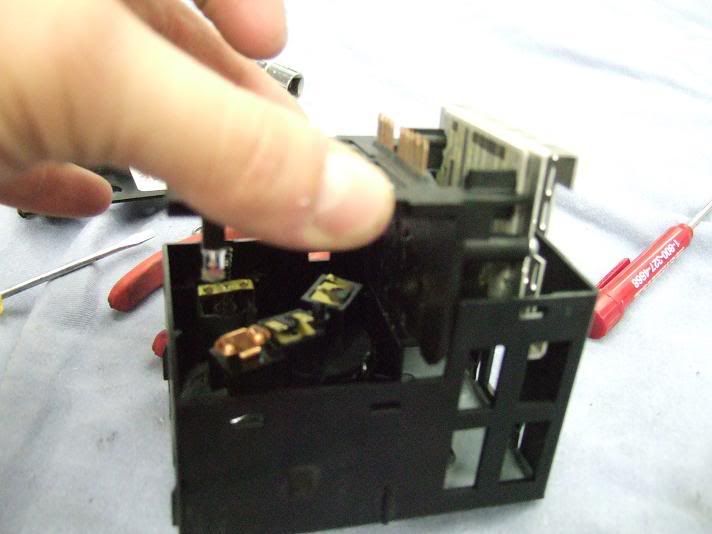
K..Now the bulb is located at the top of this pedestal. Turn the pedestal and lower it through the bored, separating it from the big piece. You will notice that the stock bulbs wires run down the pedestal, then go under it and wrap around up top...its hard to explain...basically the wires sit under the base of the pedestal, and they make contact to the circuitry when you twist and lock it onto the big piece. Put the led bulb in the same location as the stock one, and run the LED wires down the tube....solder in a Resistor, and wrap the wires around the base....so that they make connecting to the circuitry.

Next is the Heater, A/c Control. This ones got like 10 bulbs in it. patients is a virtue. K...This what it looks like out of the vehicle.....
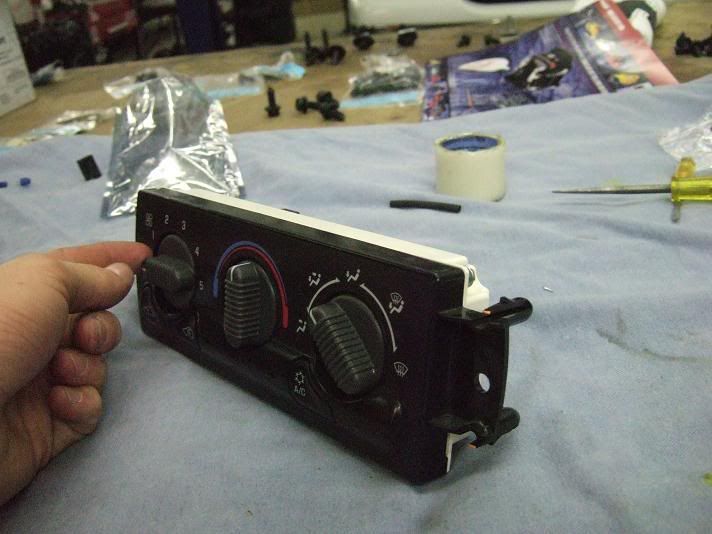
K..Pull the knobs off the front...and then remove the four screw on the back of the housing to separate the front and back from each other. Once this is done, it will look like this.
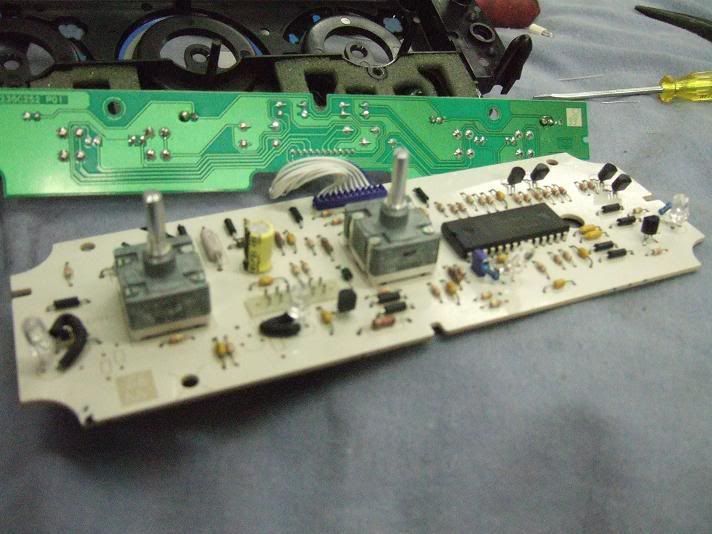
K..now on the white back housing, separate the circuit board from the housing. by pushing in 5 small plastic lock clips so that it pops off...don’t break the BOARD! Now remove the Defroster etc little circuit panel from the front fascia, there are 2 of the small hex head screws holding it there.
K..look at that pic...there are 4 bulbs that run across the bottom of the board that light up the Controls, and 5 or more(pending on truck options) on the small circuit board. Unsolder the bulbs from the back of the board, and reinstall the new LED's WITH resistors. For the smaller 2 bulbs found on the small Board...id suggest using 3mm LED's.....again. sounds easy...but it takes a lot of time, and has to be done carefully...Reassemble the control and your done.
Here is the Fog light one. Complete . Take the housing apart and look at the big round switches...you will notice that they are held in place by plastic push in clips. pry apart and remove the two buttons...now you can remove the small circuit board with the 3 lights on it. Same as it goes...unsolder and solder in new LED's and resistors. Reassemble....there are a few springs in there. so be careful
AS you Can see….it just takes a lot of time and patience...they are all pretty much the same game ..take apart. put LED;s in, and put back together. I don’t really want to go into detail about how to perfectly reassemble the switches etc….because if you pay attention you will figure it out….but ask if you need help.
Good Luck and ask any question that you may have...may want to Sticky this Moderators..
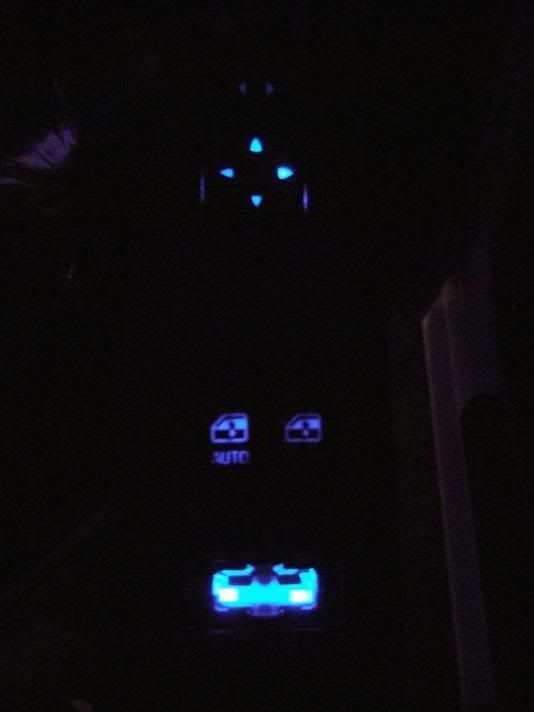
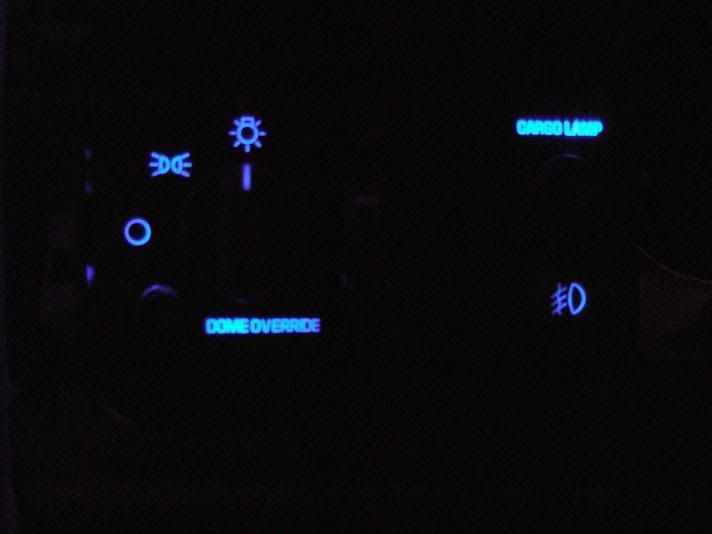
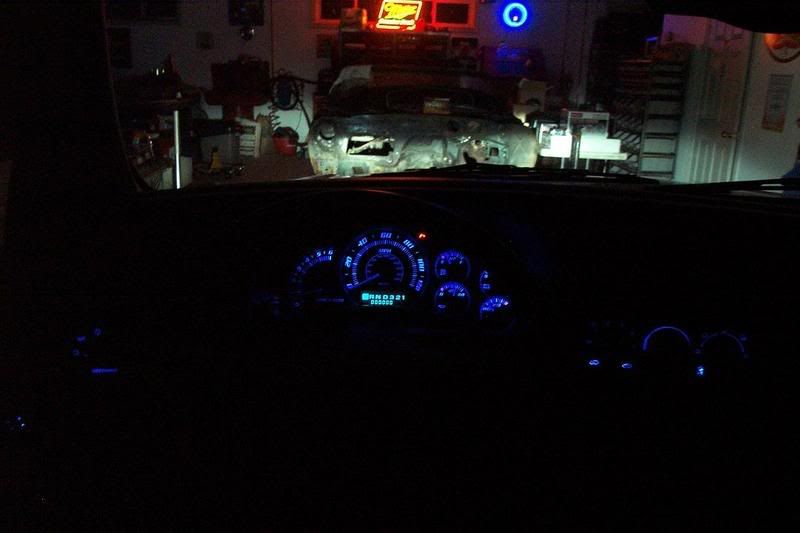
Now I used Mainly one 5MM LEd for each one...I didnt want it to be really bright in the truck, just blue. ITs up to you how many LED's you mustar in there!!! USe that Chrome Duct tape to Really direct where you want the light to go.
K..I wanted to do the LED interior change over, had a whore of a time finding info, and only a few select have done it. SO i bought 200 LEd's, pounds of resistors and set out on a mission. Here is a How to on how to do it. PM me or post questions...
Truck: 99 RCSB Loaded.
Parts Needed: Two Small Screw Drivers, Soldering Iron, Knife, Plyers, and Side Cuters.
Supplies Needed: 5mm or 3mm LED's, I used mainly 5mm normal LED's. Resistors go as follows
1 bulb takes a 670ohm resistor
2 bulbs takes 460ohm
3 bulbs take 330 or higher (this is for Blue Bulbs, all color require different)
Solder, Shrink Tube, CHROME DUCT TAPE!!!!!
!!!!!!!!!!PATIENCE!!!!!
WHEN DISMANTLING SWITCHES ETC, BE CAREFUL TO NOTICE HOW THEY COME APART..LOTS OF SPRING AND OTHER FUN STUFF FALLS OUT!
The CHROME DUCT TAPE WORKS AMAZING FOR DIRECTING LIGHT WHERE YOU WANT IT TO DO, and ELIMINATING HOT SPOTS
First thing, take door panels and Dash trim bezel off. I started with the Drive side window, and lock first, and worked my way left through the truck.
Here is a picture of the Window switch apart. Just look at the housing and you will notice small black wedge clips that hold the two pieces together. All of the switch mechanism use a clip device like this. I used two small screw drivers to pry them apart. Be careful not to stress the Plastic.
Look below; you will see a big clear shaped plastic piece. This is the Light channels...the bulbs shines, and admits light through the plastic to come to the face of the switches. Take the two small screwdrivers and pry the little feet in on the light channel so that it comes off the board. Now remove the Factory bulb....cut it or smash it off.... Now take your LED of Choice, Solder in the CORRECT resistor anywhere in the circuit. Solder one side to the board, and the other to the bulb, and the other bulb Lead to the board. You have just complete one bulb. Reinstall the plastic channel piece and your done (test before you put the entire switch back together.
Here is the Power Mirror Switch, Worse One Yet. This is what it looks like apart. Look at it...Remove old bulb, wire in resistor, and reassemble. Cut the rubber blue piece so that the new LED will stock through it…position the LED in a place where it doesn’t get in the way. It sound simple, but that is it. Takes time...but when you get it apart you will see what needs to be done....
Next is the Light Switch. This one is full of little parts...be careful, and can be tricky. Below you can see me dismantling it...look...
K..Now the bulb is located at the top of this pedestal. Turn the pedestal and lower it through the bored, separating it from the big piece. You will notice that the stock bulbs wires run down the pedestal, then go under it and wrap around up top...its hard to explain...basically the wires sit under the base of the pedestal, and they make contact to the circuitry when you twist and lock it onto the big piece. Put the led bulb in the same location as the stock one, and run the LED wires down the tube....solder in a Resistor, and wrap the wires around the base....so that they make connecting to the circuitry.
Next is the Heater, A/c Control. This ones got like 10 bulbs in it. patients is a virtue. K...This what it looks like out of the vehicle.....
K..Pull the knobs off the front...and then remove the four screw on the back of the housing to separate the front and back from each other. Once this is done, it will look like this.
K..now on the white back housing, separate the circuit board from the housing. by pushing in 5 small plastic lock clips so that it pops off...don’t break the BOARD! Now remove the Defroster etc little circuit panel from the front fascia, there are 2 of the small hex head screws holding it there.
K..look at that pic...there are 4 bulbs that run across the bottom of the board that light up the Controls, and 5 or more(pending on truck options) on the small circuit board. Unsolder the bulbs from the back of the board, and reinstall the new LED's WITH resistors. For the smaller 2 bulbs found on the small Board...id suggest using 3mm LED's.....again. sounds easy...but it takes a lot of time, and has to be done carefully...Reassemble the control and your done.
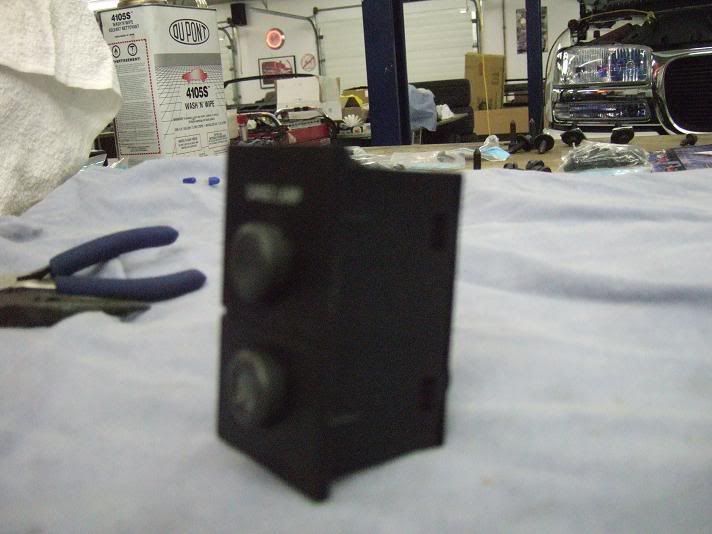
Here is the Fog light one. Complete . Take the housing apart and look at the big round switches...you will notice that they are held in place by plastic push in clips. pry apart and remove the two buttons...now you can remove the small circuit board with the 3 lights on it. Same as it goes...unsolder and solder in new LED's and resistors. Reassemble....there are a few springs in there. so be careful
AS you Can see….it just takes a lot of time and patience...they are all pretty much the same game ..take apart. put LED;s in, and put back together. I don’t really want to go into detail about how to perfectly reassemble the switches etc….because if you pay attention you will figure it out….but ask if you need help.
Good Luck and ask any question that you may have...may want to Sticky this Moderators..
Now I used Mainly one 5MM LEd for each one...I didnt want it to be really bright in the truck, just blue. ITs up to you how many LED's you mustar in there!!! USe that Chrome Duct tape to Really direct where you want the light to go.